AI Data Extraction: Pull Key Data from Legal Documents
Build an AI-powered bot that automatically extracts key data from uploaded legal documents. Review, edit, and display results — no coding required.
Today we are learning how to create our very own AI-Powered data extraction bot. This bot uses AI to extract relevant information from a document and helps you find where that information comes from with ease.
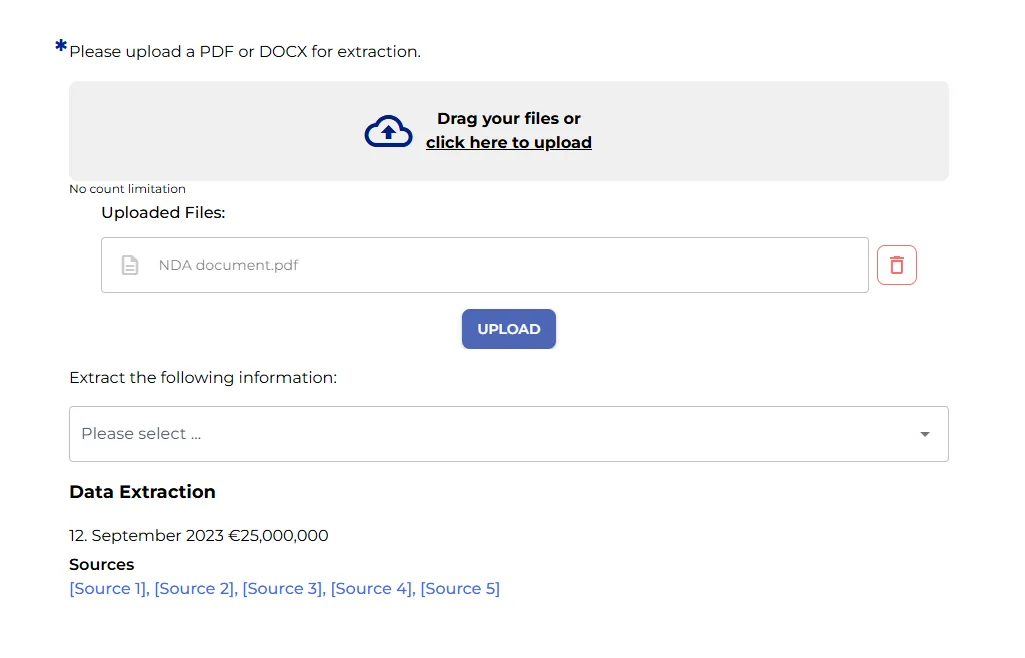
Legal professionals can transform their workflow with this tool that delivers both precision and efficiency. Let’s check its potential on the front end. The first thing we need to do is to upload the document we want to extract information from.
Right below, we find a dropdown with different pieces of information we may want to extract from the PDF. Simply select your preferred option.
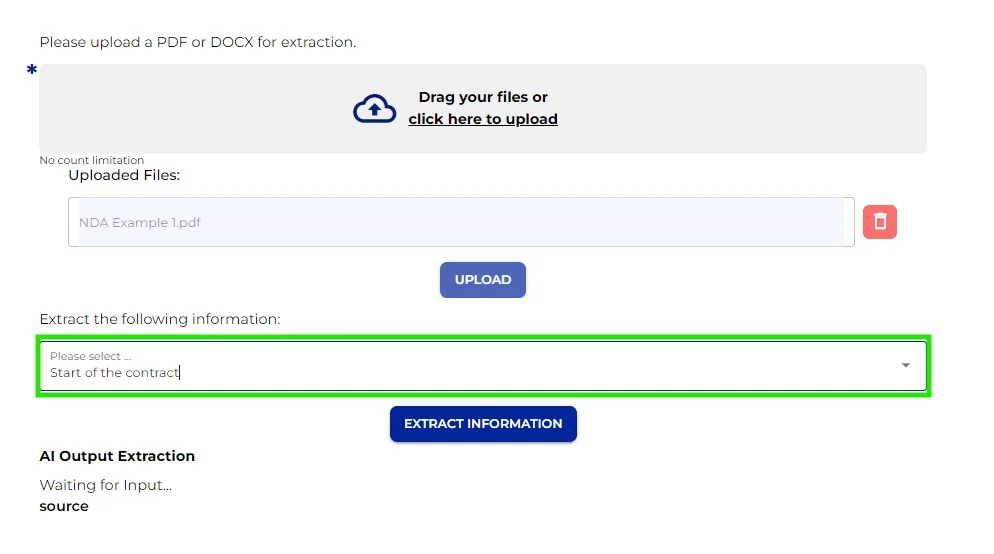
Next, click “Extract information” and in a few seconds the AI does its magic. Here you have your desired information. But that is not all, you can also see the source and its information.
Are you impressed? Now it is your turn to build your AI Data Extraction Bot. Let’ do this!
Let’s build this bot step by step!
Step 1: Define and Upload
As we always do, let’s write a catchy name and a brief description for our bot.
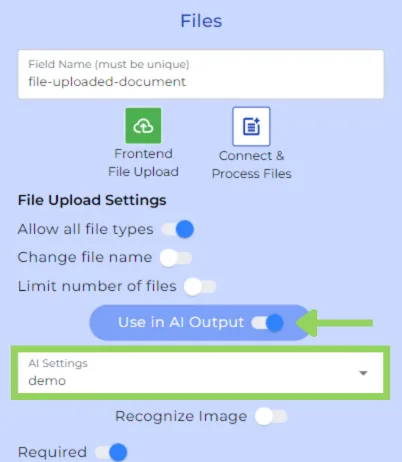
In order for the user to provide the file, we need to include a “files” node. We need to remember to toggle the “Use in AI Output” and to select the AI Settings, otherwise the AI will not be able to extract the desired information.
Step 2: Choose your extraction target
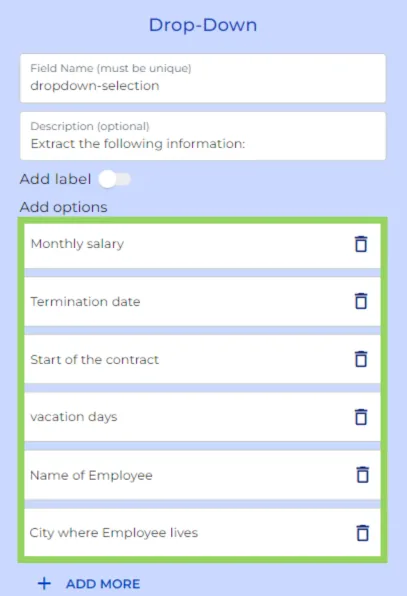
Continue by adding a dropdown node. Here we will write some pieces of information that can be extracted from the file. Keep in mind that these are the options we considered, but feel free to adjust them to better suit your needs.
Step 3: Configure the AI Engine
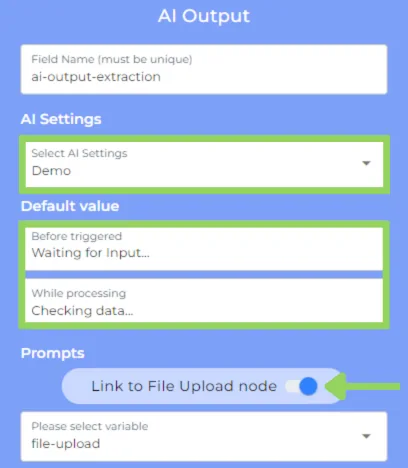
Afterwards, it is time to include the “AI Output” node. Select the same “AI Settings” from the “files” node and write concise “default values” such as “Waiting for Input” and “checking data”.
Next, toggle the “link to files node” and select the file you want the AI to extract the information from.
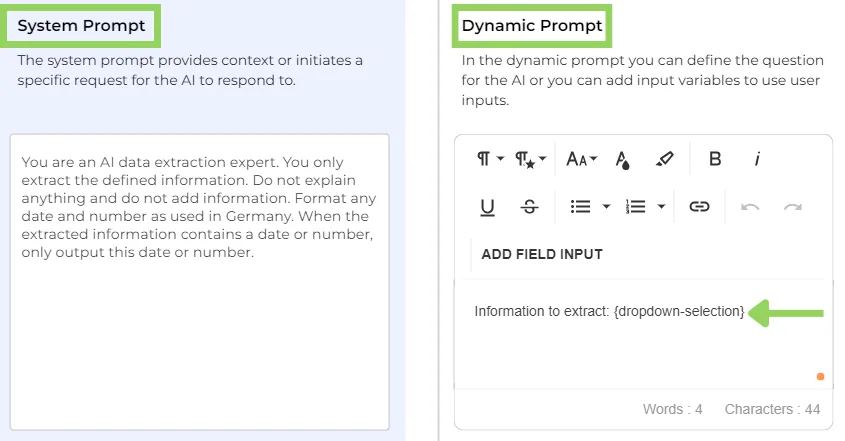
Now for the tricky part. The prompt. First, on the “system prompt” ask the AI to extract the defined information, and on the “dynamic prompt” define that information by adding the dropdown variable. By doing this the AI knows that only must extract information relevant to the option selected in the dropdown.
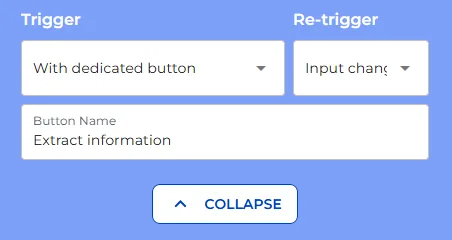
To end up with this node, select “with dedicated button” to trigger the AI, “Input Changes” from the second dropdown and write a concise button name, something like “extract information”.
Step 4: Display your extracted data
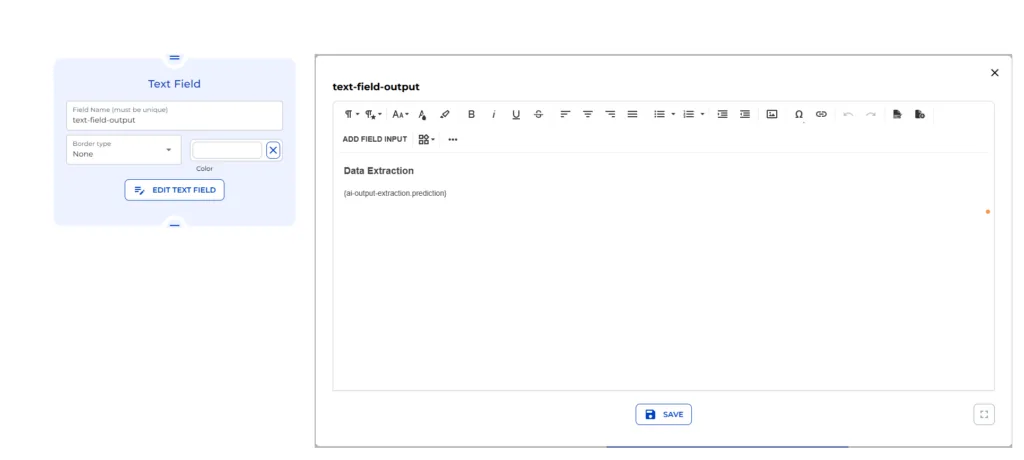
Right below, add a text field node with the extracted information, in other words, with the AI Output variable.
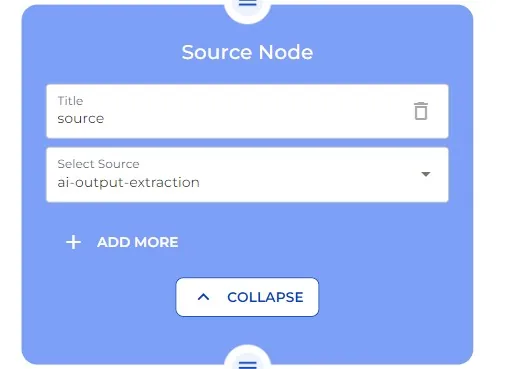
Step 5: Add the Source Node
After text field add the Source Node. Give it a name and from the dropdown menu, select ai-output-extraction
Finally, we have completed our creation.
Happy automating with e!