How to Use AI to Read & Extract Data from Image Files in e!
Learn how to activate the Recognize Image toggle in e! to extract data from image files, scanned documents, and photos using AI — no coding needed.
Today, we’re excited to introduce the “Recognize Image” feature in the File Upload Node on our “e!” automation platform. Let’s dive into how this cool new tool works.
Firstly, the File Upload Node deals with two types of files. One type includes text files like Word documents, CSVs, or PDFs that have been processed for text recognition (OCR). You can easily copy text from these files.
On the other hand, we have files that are more about images. These could be PDFs saved with images, or documents with stamps and handwriting on them, which don’t let you select text as easily.
Here’s where the “Recognize Image” feature shines. It goes beyond the usual text recognition. Instead of just looking for words, it looks at the entire image and gives you information based on what you ask it. The better you describe what you want to know, the better the answers you get from the AI.
Now, let’s see how to use this in the “e!” platform’s Bots:
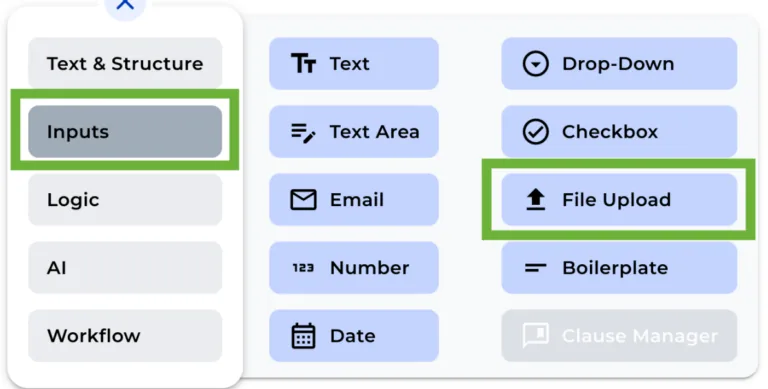
Step 1: Add the File Upload Node
Add a File upload node in your bot from the “+” menu.
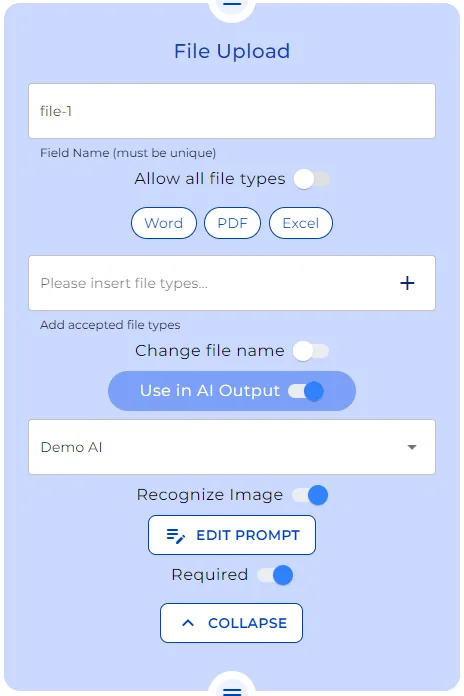
Step 2: Set File Type Restrictions (Optional)
After you modified the field name of the File Upload Node for internal reference, (Keep in mind that this field name will not be visible to the user in the front-end), choose whether you want to allow only specific file types to be uploaded or if you prefer not to have any limitations on file types. (in this tutorial, we Allow All File Types).
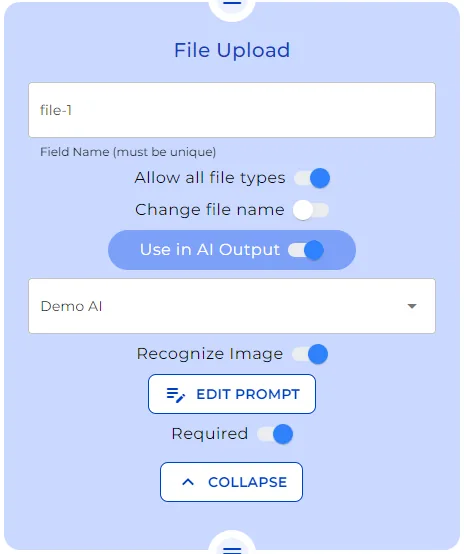
Step 3: Link the file to an AI Output node
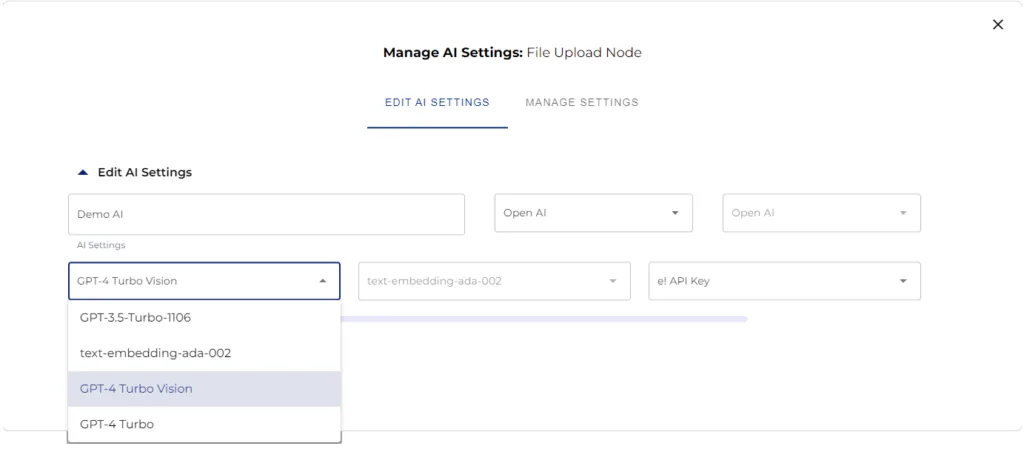
In order to use uploaded documents in an AI output node, you need to switch on the “Use in AI Output” toggle. From the dropdown, select “Create or modify AI Settings” to open the AI setting modal. On the modal, first, enter the name, second, select the provider, next, the AI model –most importantly, selecting the GPT4Turbo-Vision is mandatory for OCR reading capability of the bot-, and finally the API Key. Once this is done, click over the “save” button and the AI setting will be created.
Bear in mind that you must select the same setting in the AI Output node.
Step 4: Setting the Prompt
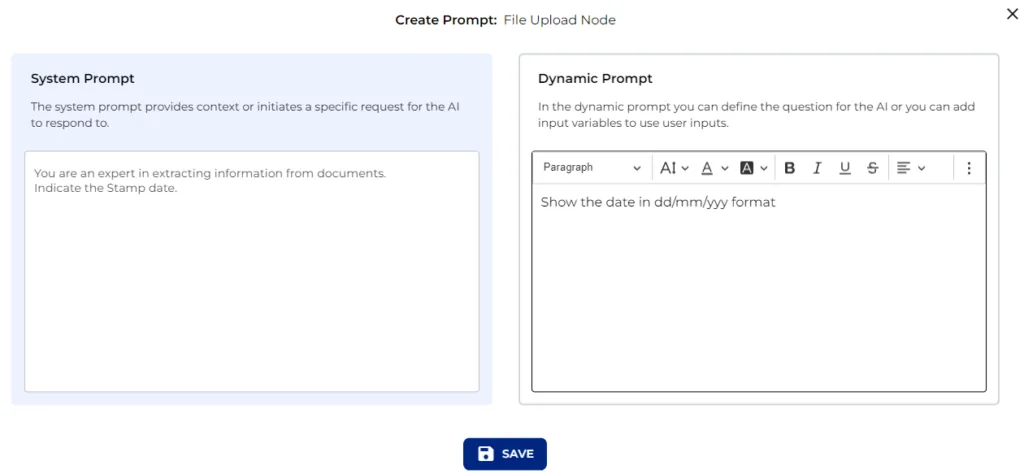
Toggle the ‘Recognize Image’ and select EDIT PROMPT. In this example, we are using the following as System and Dynamic Prompt:
System Prompt:
You are an expert in extracting information from documents. Indicate the Stamp date.
Dynamic Prompt:
Show the date in dd/mm/yyy format
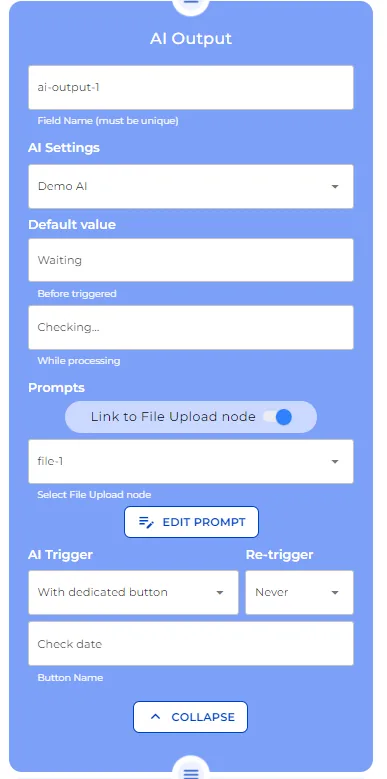
Step 5: Setting AI Output Node
To bind the AI Output node to the File Upload Node:
- Choose the File Upload node from the dropdown menu in the AI Output node.
- Input an identical prompt to ensure consistent AI action.
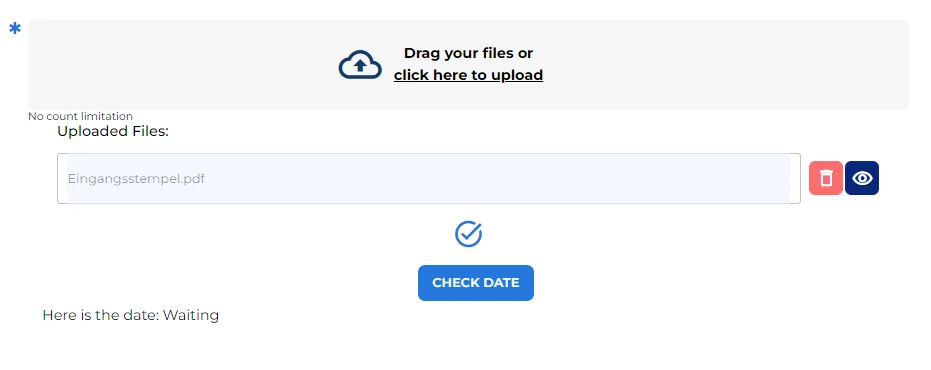
- Trigger the AI via a bespoke button—our example is aptly named “Check Date” and opt for ‘Never’ in the retrigger settings.
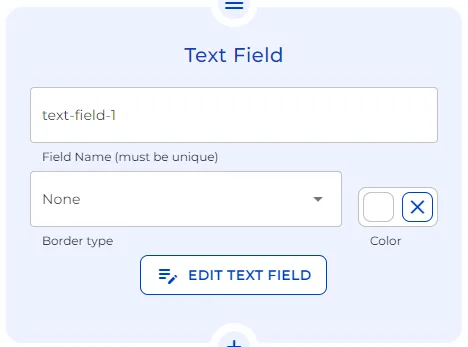
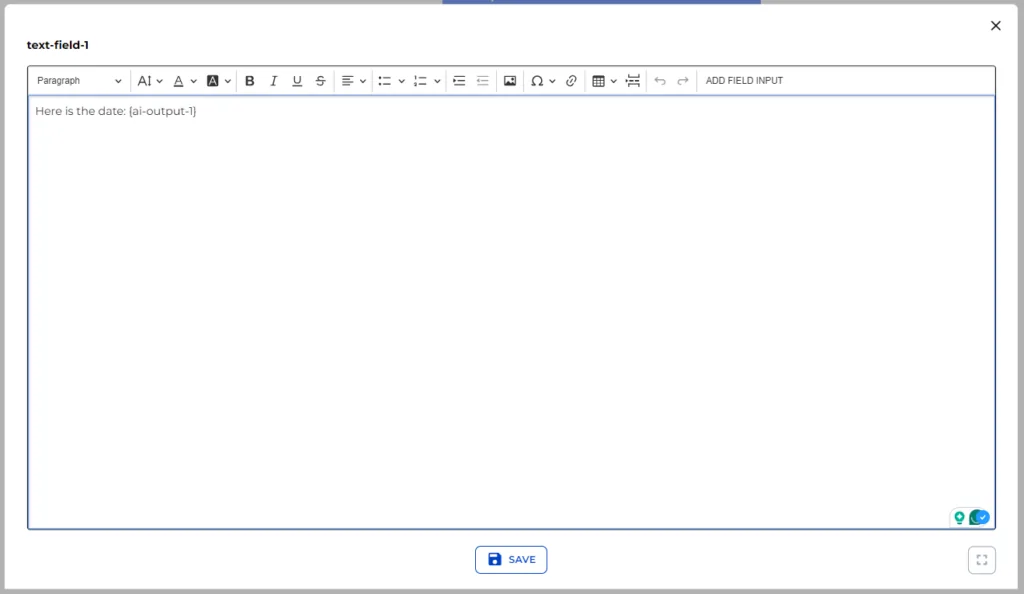
Step 6: Add Text Field Node
To render the AI Output in the front end, append a text field node linked to the AI Output variable.
Upon reviewing our creation in Preview mode:
- Test the File Upload Node with an image-saved PDF, observing upload times contingent on file size.
- Utilize the preview eye icon, exclusive to the builder’s view, to scrutinize the extracted text.