How to Set Up a Checkbox Input Node in a Legal Bot
Learn how to set up a Checkbox node in e! — configure options, inline layout, exclusivity, required toggle, and values for use in conditions and calculations.
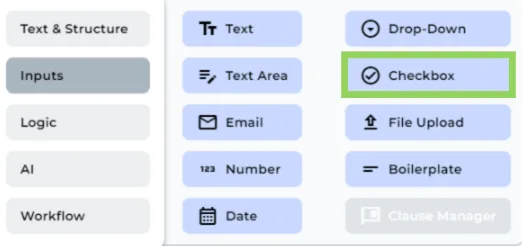
The Checkbox Node is an Input Node that allows users to select options using checkboxes when interacting with the front end of your bot. In this tutorial, we will guide you through customizing the Checkbox Node to suit your requirements.
Step 1: Add the Date Node
Add a Checkbox Node in your bot from the “+” menu.
Step 2: Change the Field Name
As with any other node, you can modify the field name of the Checkbox Node for internal reference. Keep in mind that this field name will not be visible to the user in the front end.
Step 3: Add a Description (Optional)
If you’d like to provide additional information for the user, you can include a brief description in the optional description box.
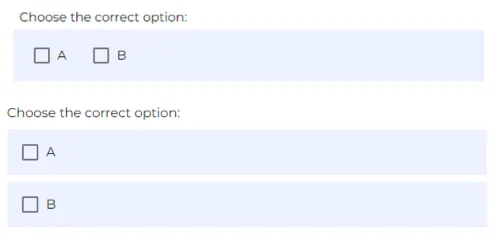
Step 4: Inline toggle
You can toggle “Inline” if you prefer your checkbox options to be displayed horizontally. If you don’t toggle inline, the options will be displayed vertically.
Step 5: Enter Checkbox Options
Input the options you want to include as checkboxes. As a pro tip, pressing the “Enter” key will automatically create a new option.
Step 6: Toggle the “Required” Option (Optional)
You can decide if the Checkbox Input is mandatory by enabling the “Required” option.
Step 7: Set Checkbox Exclusivity (Optional)
Choose whether the checkboxes should be exclusive, meaning users can only select one option. If you do not activate this, users can choose multiple options in the front end.
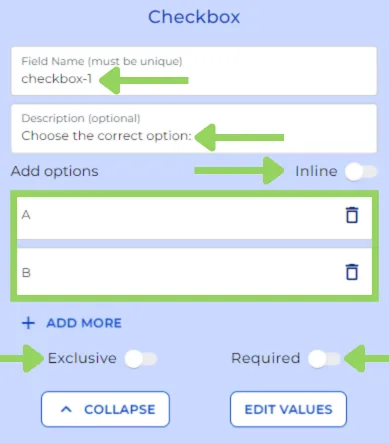
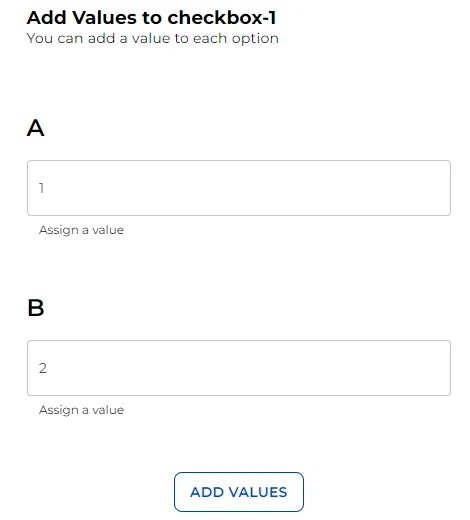
Step 8: Add Values or Categories to Options (Optional)
For each option, you can assign values or categories that can be used in logical conditions or the calculation node. Simply add the values or categories and click on “Add values.” If you need more information about those nodes, you can watch:
Remember to click on “Preview” in the top menu to see how your bot will appear to your clients. This helps in making any necessary adjustments before implementation.
That’s all for now. See you soon!