How to Add an API Connector to Your Legal Bot Account
Add and configure an API Connector in e! — set up provider, authorization method, API key, and endpoints to connect any external tool to your Legal Bot.
Welcome to the part 1 of the API Connector series. In this section we will learn how to add the API Connector to your account. This task is typically handled by an account administrator with IT expertise. You can also request your support team at LEXEMO to take care of these settings for you.
Now, let’s look at how the process looks like:
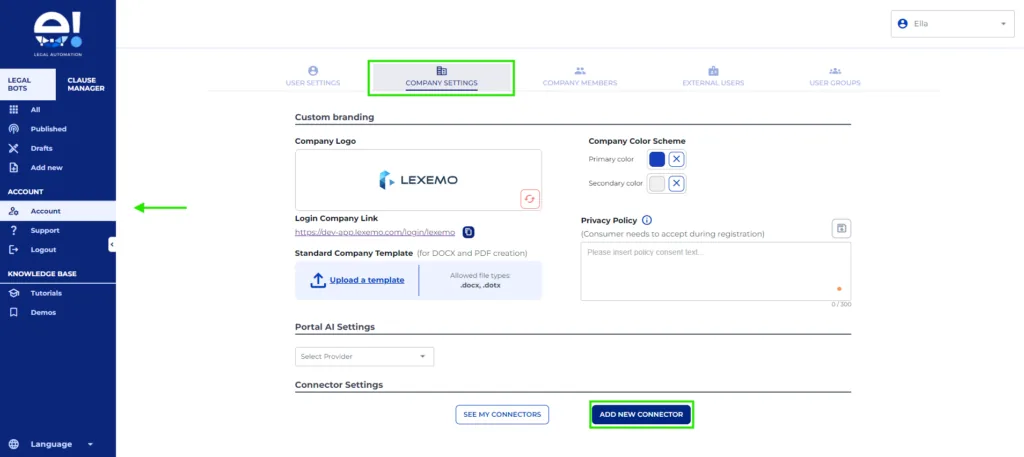
Step 1. Add New Connector
- Navigate to Accounts: Start by heading over to the Company Settings section.
- Add New Connector: Click on the “Add New Connector” option.
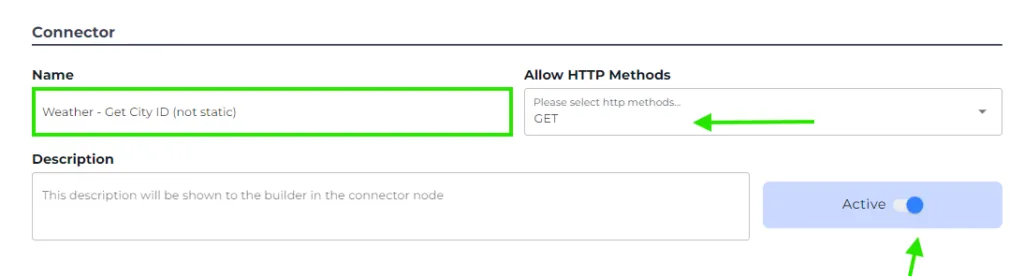
Step 2. Set up the Connector
- Name Your Connector: For demonstration purposes, let’s call it Weather Get City ID.
- Select the Method: Choose the HTTPS method (your admin can find this in the API documentation); for our example, we will select GET.
- Toggle Active: Ensure that the connector is set to active.
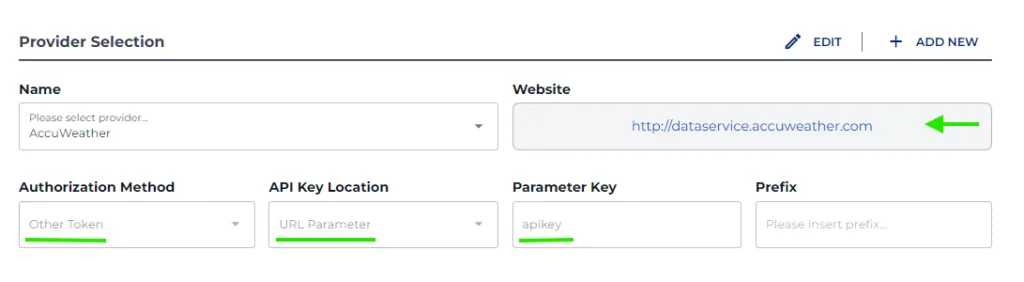
Step 3. Set up the provider
- Select Accuweather: Choose your provider from the dropdown menu and click on + Add New.
- Enter Website URL: In the website section, input the URL from which you are obtaining the API. Remember, this is just for reference and not the API URL used in the connector.
- Define Authorization Method: Specify what authorization method is used by that API; this information can be found under Swagger’s name.
- Set Authorization Type: For AccuWeather, we will use Authorization Method (Other Tokens) as a URL parameter with an API Key, then click Save.
Step 4. Configure the Access Key
- API Key Name: Enter a name like AccuWeather.
- Value Input: Paste your unique API key value here, specific to your account or business.

Step 5. Configure the endpoint for our example, which is City Search
- Name Your Endpoint: Label it as City Search.
- Description Field: Use this space for any additional explanations regarding the API key.
- URL Configuration: Paste the endpoint URL and remove the base URL; we only need the endpoint itself.
- Automatic Population of Variables: When you click on “+“, the system will automatically populate everything, turning items in brackets into variables.
- Manual Option Available: If you prefer, you can also do the entry manually. Simply click on the + buttons on the right side to add the parameters manually.
- Once happy with the settings, click Save.

And there you have it! You’re all set to harness the power of APIs with ease and efficiency!
Now, go ahead and check out Part 2 of the API Connectors series to learn how to use the API Connector in an automation.
In part 3, you can learn more about the API Connectors from a Technical point of view.