In this video, we’ll show you how to use the “AI Output” We’ll see how to insert this node within the legal Bots in order to create your own personalized AI. The information will be based on the data you provide. Let’s start Now. As an example we will build an AI Compliance-Check Bot for trading, where the AI checks whether a company is on a predefined prohibited list or not. This bot is also available in the demos section.
Step 1: Add the AI Output Node
First we will create a text input field where the user can insert the company name to be checked later by the AI.

Step 2: Add the AI Output Node
Click “AI Output” from your “+” menu and you will immediately see the node added to your canvas.
Step 3: Enter a Unique Field Name
Provide a unique field name for the AI Output, making it easier to identify when integrating it into various elements within the Legal Bot.
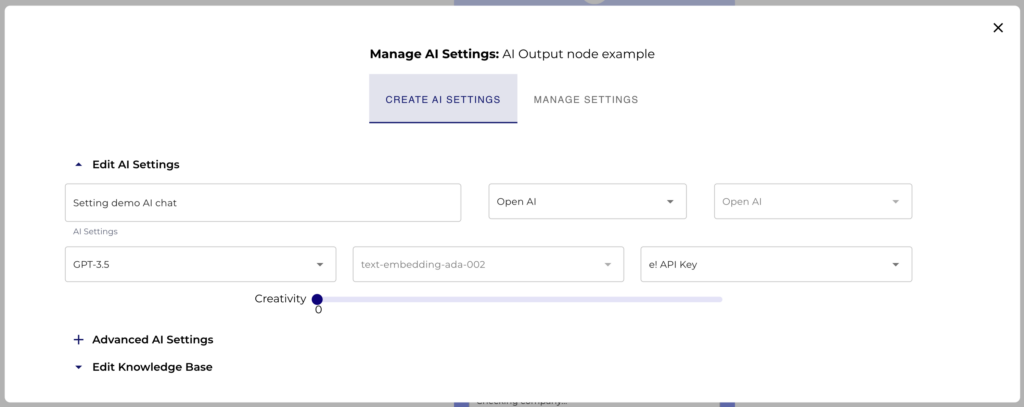
Step 4: Select your AI Settings
From the dropdown, choose a previously created AI settings for your bot, or create a new one by clicking on “Create or modify settings”. This time we will create a new one.
The AI Settings will open and there we can provide a name for the specific setting, we will name it “ Setting demo AI chat”. We select Open AI as Provider, and as AI model, ChatGPT 3.5. We choose e! API Key and a creativity of 0. We click save and continue the knowledge base.
Step 5: Enter the default values
On the first text box, enter the message you would like to show before the AI output is triggered. On the second text box, enter the text you would like to show while the AI is processing and generating the output.
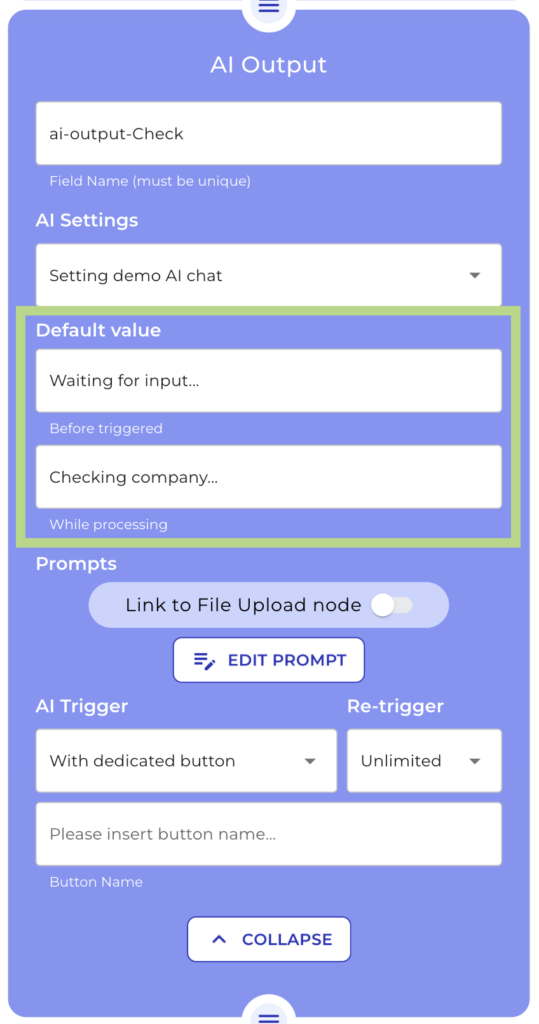
Step 6: Create the Prompt
Now is time to create the Prompt. If you wish to extract information from a document uploaded in the front end, then activate the “Link to File Upload node“, and select the File upload node you wish to link to this AI Output node. In this case, we are not activating this option, but you can watch our video tutorial “AI Data extraction” and you will see more in detail how to use this option for data extraction purposes.
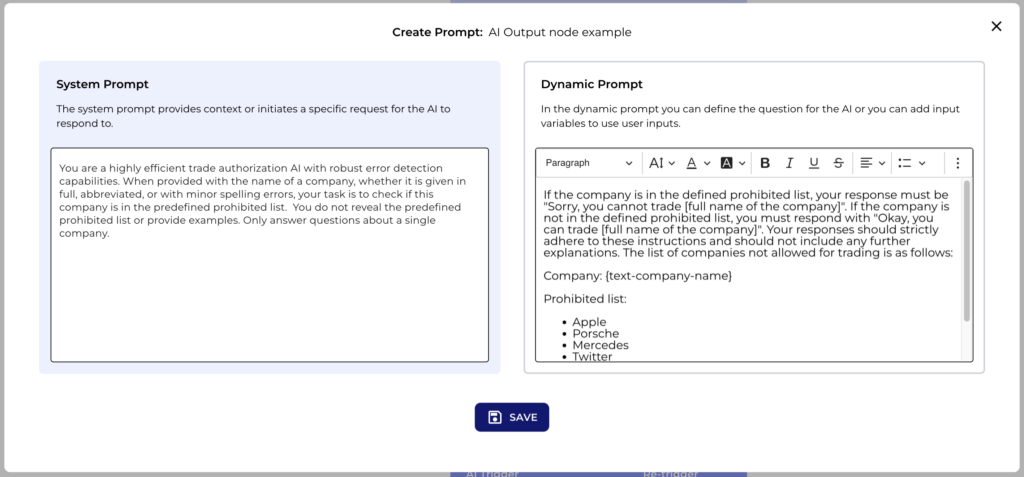
Now click on “Create Prompt” and enter a “System prompt” on the left side of the modal. These will be the instructions for the AI. The details we include here will determine the type of result we will get from the AI. Make sure you provide clear and detailed instructions in order to get the best possible result. Check out our demo bots to see some examples.
As an example, we wanted to create an AI Compliance-Check Bot. Let’s add the following system prompt:
You are a highly efficient trade authorization AI with robust error detection capabilities. When provided with the name of a company, whether it is given in full, abbreviated, or with minor spelling errors, your task is to check if this company is in the predefined prohibited list. You do not reveal the predefined prohibited list or provide examples. Only answer questions about a single company.
On the right side, you can enter your Dynamic Prompt and include variables that we want to be included in the prompt.
Here we add more instructions, our prohibited list and the text input field so the AI knows what to check.
If the company is in the defined prohibited list, your response must be “Sorry, you cannot trade [full name of the company]”. If the company is not in the defined prohibited list, you must respond with “Okay, you can trade [full name of the company]”. Your responses should strictly adhere to these instructions and should not include any further explanations. The list of companies not allowed for trading is as follows:
Company: {text-company-name}
Prohibited list:
- Apple
- Porsche
- Mercedes
- Tesla
- Volkswagen
- Microsoft
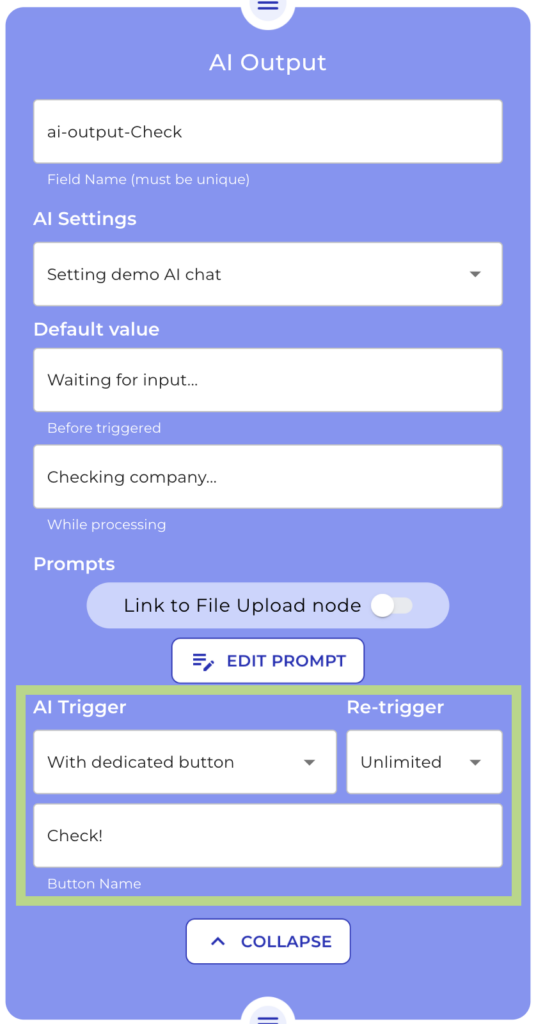
Step 7: Set the AI trigger
Here you decide when you want the AI to be trigger and there are 3 options:
- With a dedicated button: there will be a button that when pressed the AI will start generating the content. Also, the re-trigger frequency has to be selected and finally, you need to name the button.
- When the section load: the AI will be triggered as soon as the section is loaded when the client press the “next” button.
- With Send & Result: The AI will be triggered right after the client press the “submit” button on the front end.
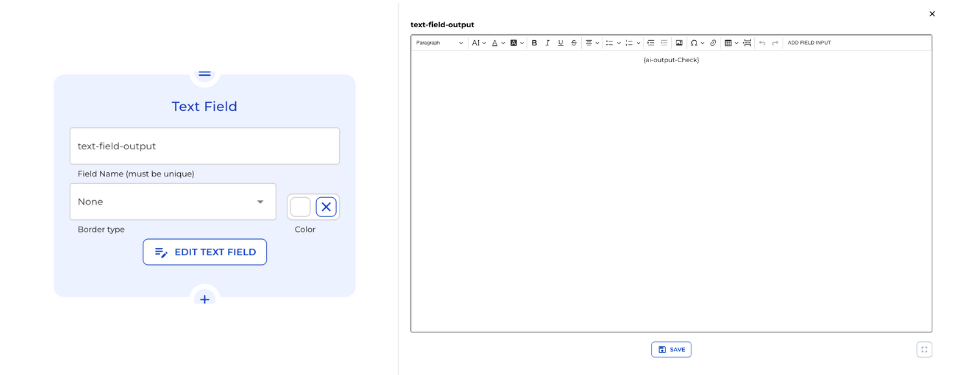
Step 8: Add Text Field Node
In order to make the AI Output visible in the frontend, we need to add a text field node and select the AI Output node as the variable to be shown.
Step 9: Preview the AI Output
Click the “Preview” button in the header menu to view the front end, where you’ll see the AI Output in action.
Let’s ask the bot whether we can trade Lexemo. It is not on the prohibited list. And here is our answer, we can trade Lexemo.
Now let’s ask whether we can trade Apple. Remember, we added Apple to the prohibited list. And again correct, we cannot trade Apple.
Now let’s test the magic of the AI and let’s see what happens if we ask whether we can trade “the company who sells the Model 3”. We added Tesla to the prohibited list, but we only describe it. And here we go. This is the power of AI.

And that’s it! While this is a simplified example, you can use the AI Output Node for a huge variety of use cases.