In this video, we’ll see the use case of data extraction using the AI Output Node. Please note that the materials presented are purely illustrative
Step 1: Setting the Foundation
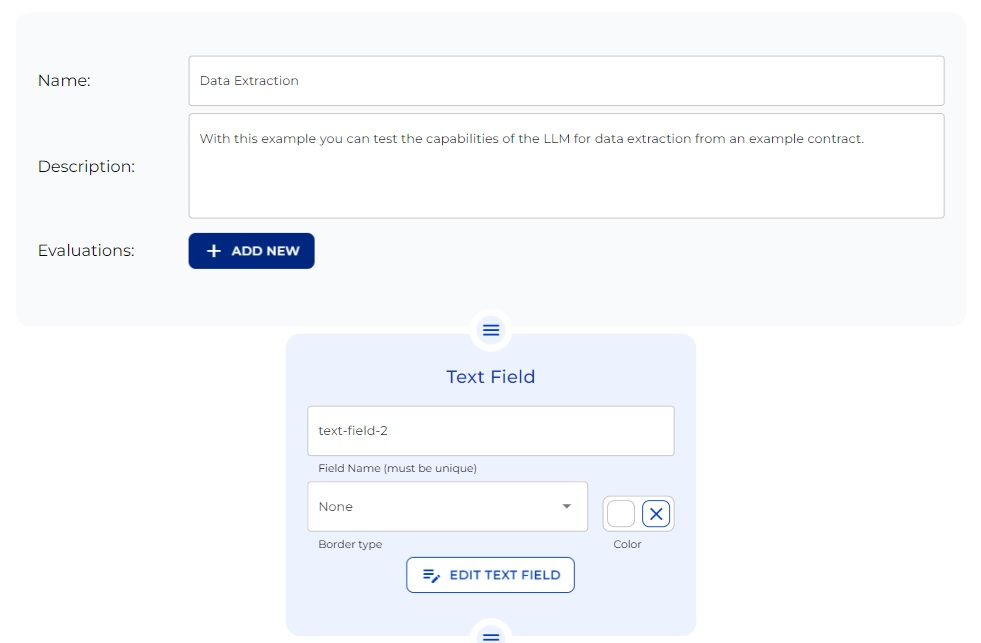
First, name your bot and, draft a brief description. Don’t worry; users won’t see this description, it’s just for your reference. Next add a Text Field to include the action explanation for your client.
Step 2: Upload with Ease
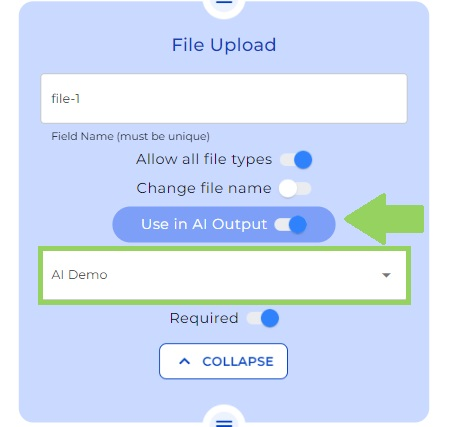
Continue adding a File Upload Node on your canvas. This is where clients will upload files for data extraction. Simple and efficient!
Step 3: Add your dropdown
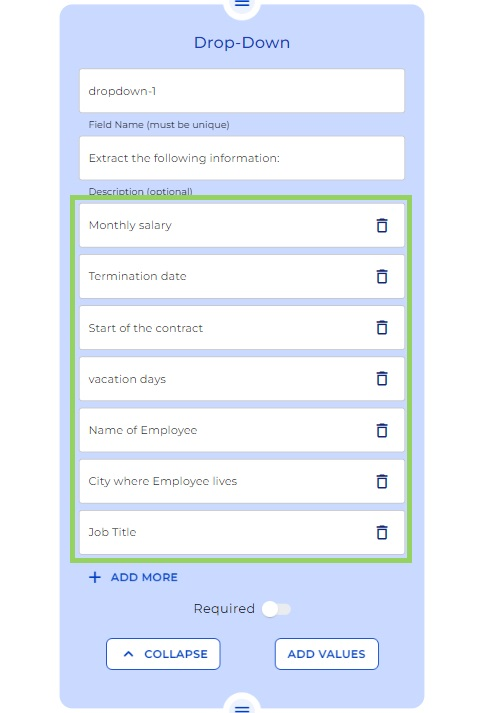
Next, add a dropdown node and let’s add some options. Here we will decide what specific data we want the AI to extract from the document uploaded in the front end. You can find the options below:
– Monthly salary
-Termination date
-Start of the contract
-Vacation days
-Name of Employee
-City where Employee lives
-Job title
Step 4: Setting up the AI Output Node
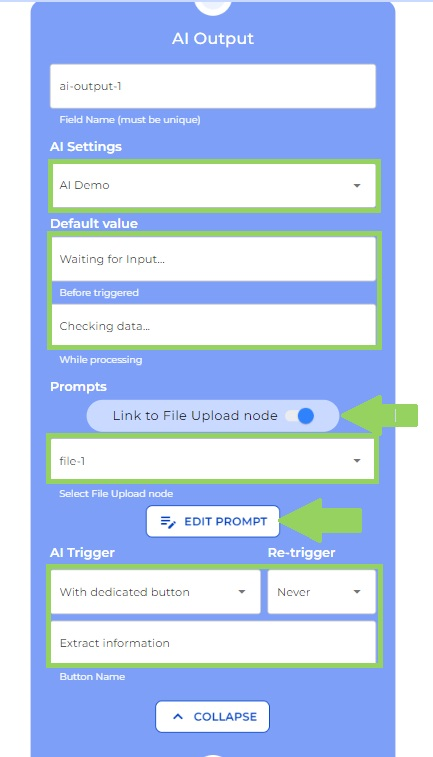
Now, add the AI Output Node to your canvas and let’s dive into some settings.
First, click on the dropdown and select “Create or modify AI Settings” Here, name your AI setting, pick the AI model, and insert the API key.
Next up, set a default value as a placeholder for the AI output, for example “Waiting for data” and “Processing data”.
Now is time to link things up. Activate “Link to File Upload node” and select from the Dropdown the name of the File Upload node we have just created. Now, both nodes are connected.
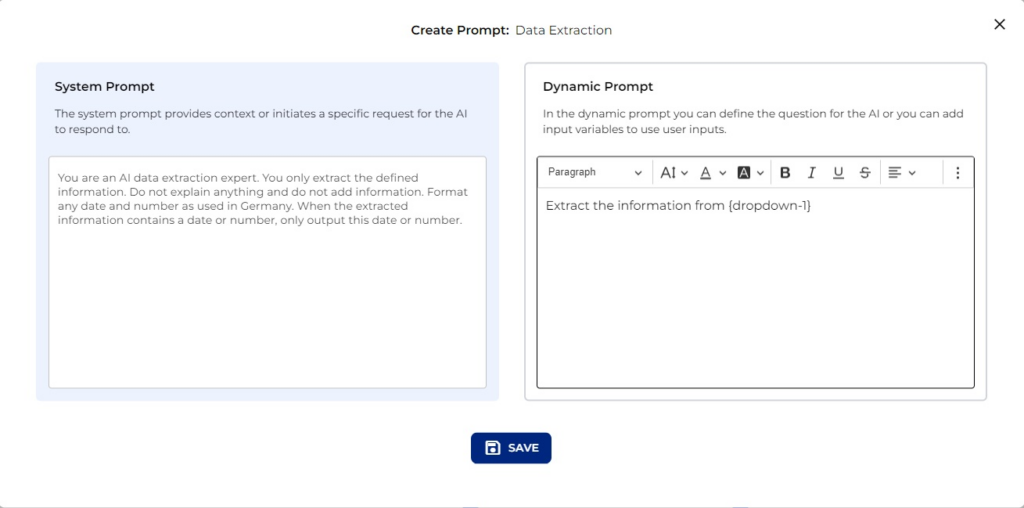
It’s time to give directions to our AI. Click the “Create Prompt” button. In the modal, we add a system prompt on the left side and on the right side, a dynamic prompt. This last one is to specify the information you’d like to extract. For today’s tutorial, let’s aim for a job title extraction. Don’t stress you can see the prompts we have used just below:
System Prompt:
You are an AI data extraction expert. You only extract the defined information. Do not explain anything and do not add information. Format any date and number as used in Germany. When the extracted information contains a date or number, only output this date or number.
Dynamic Prompt:
Information to extract: {dropdown-1}
Now, we will trigger the AI with a dedicated button. Just select this option from the dropdown. We will leave the re-trigger as never, and for simplicity’s sake, we’ll name our button “Extract Information”.
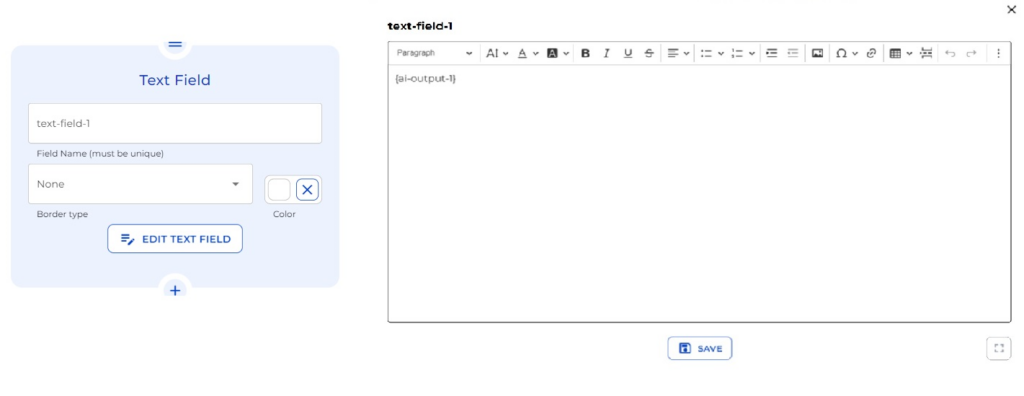
Step 5: Displaying the Results
Finally, add a Text Field Node and include the variable of your AI Output node. This is where the magic results of your AI Output will be showcased for all to see.
Step 6: Testing Time:
Click Preview to see the LegalBot at work in the front end. Now you just need to upload a contract, select the specific data you want to extract from the dropdown and finally click on the Extract information button. All left to do is wait for the AI to do its magic!
Ready to build your own? Let’s get started!