Hello again! In this video, we’re diving deep into e! Admin Account settings. Here, you’ll discover how to Add, manage and delete members of your company from the account. So, let’s dive in!
Step 1: Navigating to Account Options
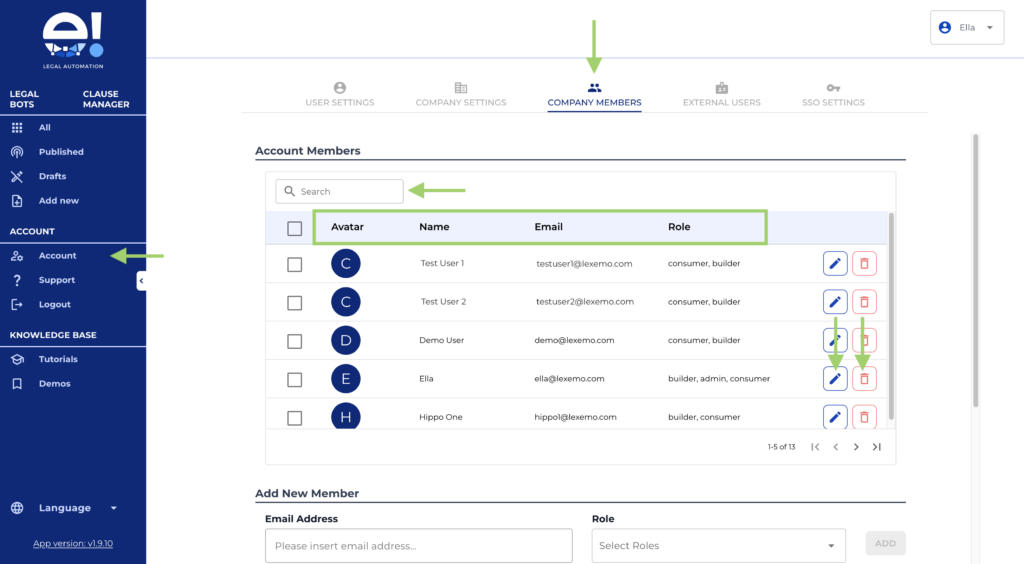
From the left menu, locate the “Account option” and click on it. This is your gateway to managing company members.
Step 2: Accessing Company Members
Open the “Company Members tab”. You’ll find different sections here, each designed to streamline member management.
Step 3: Reviewing Account Members
In the “Account Members” table, view all members in your account. Key details like “Avatar”, “Name”, “Email”, and “Role” are visible for easy member identification. Use the “search bar” to quickly locate a specific member.
From this table you can either delete or modify each member’s account or bots under the account.
Do you want to edit member details? Click the “pen icon button”. A modal will pop up, allowing you to see the member details and modify their role.
From this modal you can also see the “Number of bots under this person account”, and the “Manage user bots” button. Clicking this button a new modal will open letting you transfer bots to another member or delete bots associated to the account.
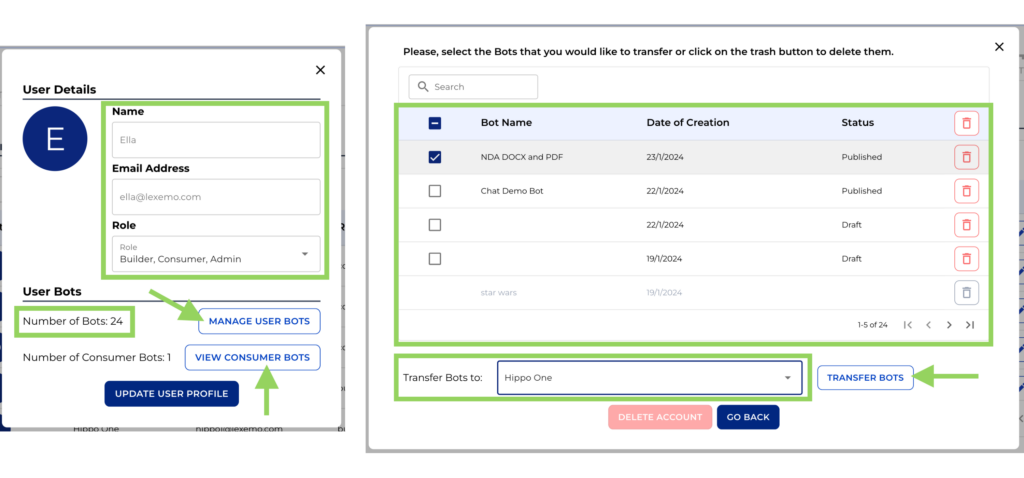
Bear this in mind, as these steps are required when trying to delete a member that owns several bots.
To delete a member, click the “bin icon button”. A warning will prompt if they own bots, asking you to either delete or transfer these bots. If no bots are linked, simply confirm the deletion.
If your account does not have any members yet, this table will remain empty, and you will need to add them from the section below.
Step 4: Adding New Members
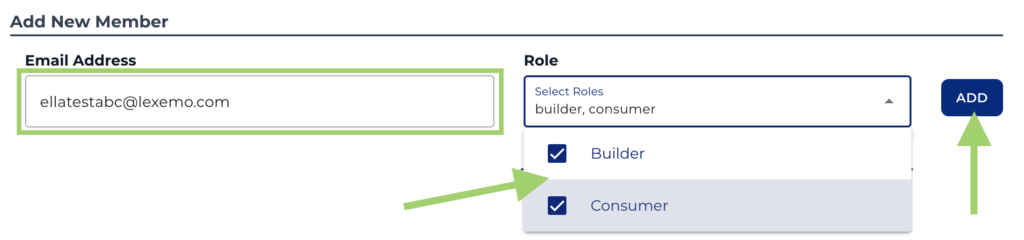
If your account lacks members, add them in the “Add New Members” section. Enter the member’s email with your company domain and assign their roles.
Once you have added a member, the details will appear automatically in the next section.
Step 5: Managing New Member Invitations
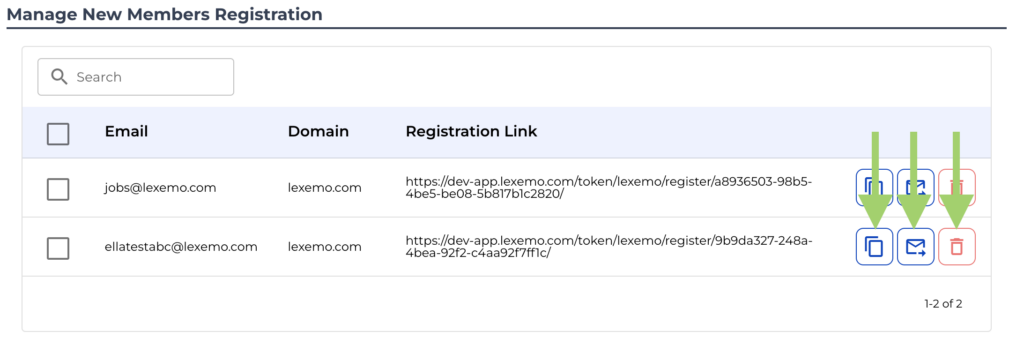
Finally, in “Manage New Members Registration”, manage all new invites. Choose to send the invite from your personal email address copying the registration link or send it via an automated email. If needed, invitations can also be deleted here.
That’s it! Managing your company’s e! Member Account is straightforward and efficient. Happy automating with e!