With the Input Email node, you can add an input field to your bot, where the client needs to enter an email address.
In this video, we’ll see how to add an Input Email:
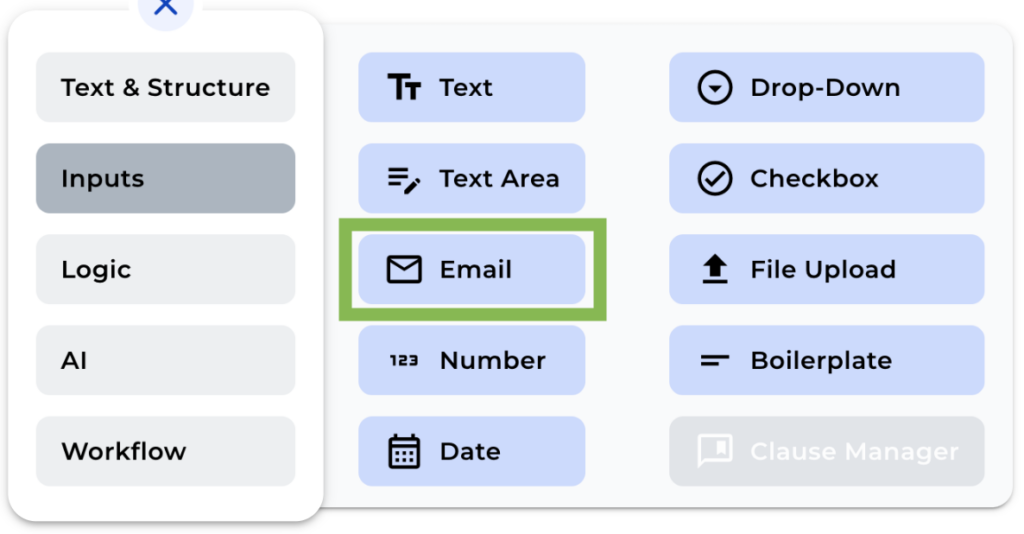
Step 1: Add the Email Node
To add an input email node to your bot, simply click on “email” in the “+” menu.
Step 2: Rename the Node
You can change the name of the node for better identification. In our example, we’ll rename it to “client-email.”
Step 3: Provide an Explanation (Optional)
If you’d like to give your clients additional information about the input field, you can include a brief description in the description box.
Step 4: Add a Placeholder or default value (Optional)
To guide your clients on what to enter in the input field, you may include a placeholder text or a default value by clicking over the buttons on the right side of the text box.
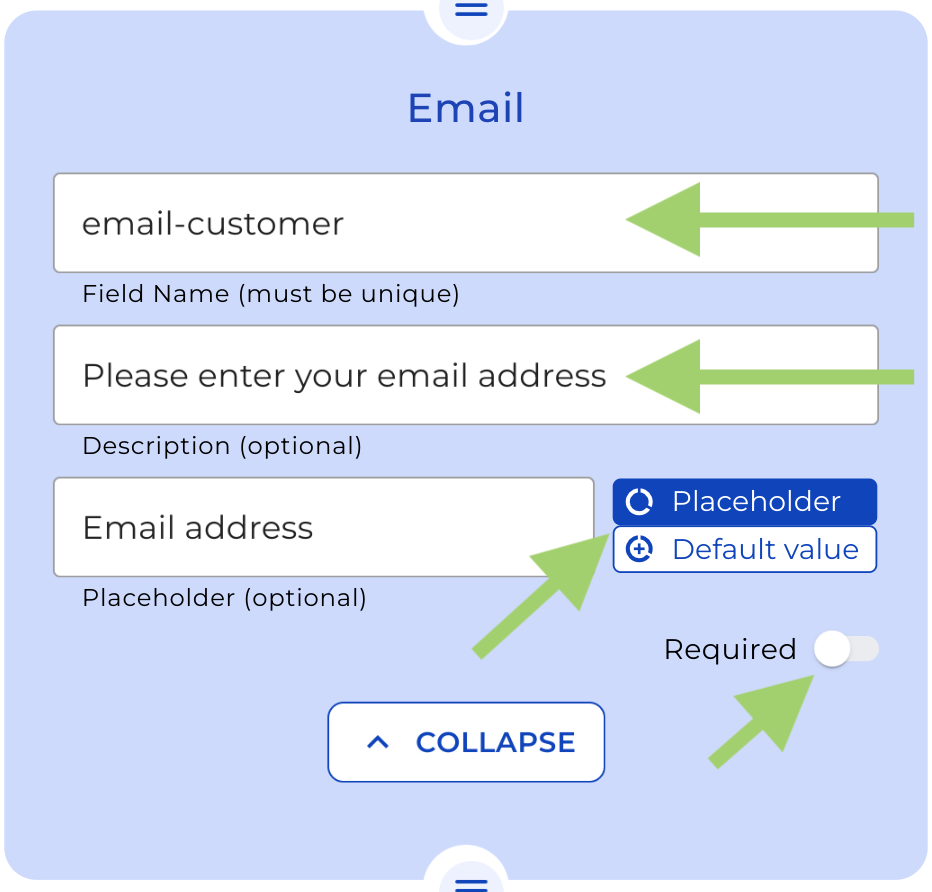
Step 5: Toggle the “Required” Option
By enabling the “required” option, you ensure that the bot cannot be completed without the client providing their email address. Be cautious when using this feature, as it may impact user experience.
Remember to click on “Preview” in the top menu to see how your bot will appear to your clients. This helps in making any necessary adjustments before implementation.
That’s all for now! We hope you found this tutorial helpful!