Today, we’re diving into the world of bot evaluations.
These evaluations are like mini explanations, which are visible in the front end and in this case are very useful to show the potential riskiness involved in choosing certain options from checkboxes.
Ready to become an evaluation whiz?
Step 1: Hit “Add New”
This is your starting point. Click the “Add New” button and edit. We can add up to 3 Evaluations in one bot. However, for this tutorial we are going to add only one.
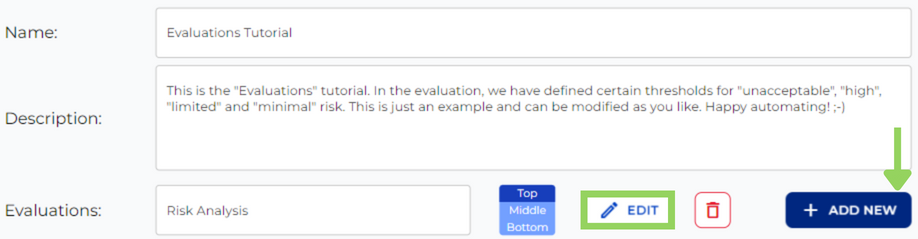
Step 2: Catchy Headline
Think of this as the title for your evaluation. Keep it short, something that grabs the user’s attention.
Step 3: Description Time!
Click “Edit” to add a clear and concise explanation of what the evaluation means.
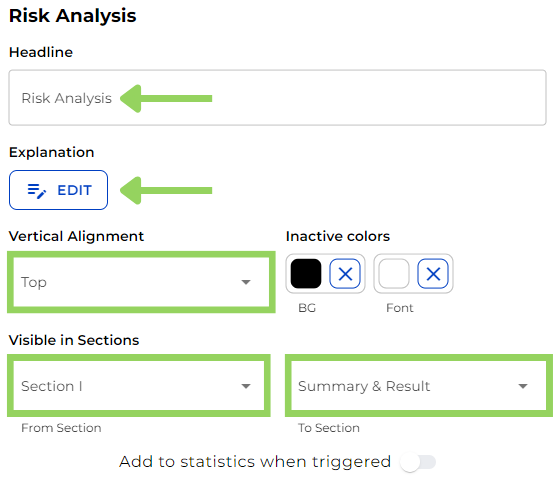
Here we see the Evaluation headline is prefilled with the same name we added previously.
Step 4: Setting the Stage
Next, we are going to choose where we want our evaluations to be aligned in the front end. Top, bottom or middle? You choose. Plus, you can customize the background and font colors for when the evaluation isn’t active.
Step 5: Choosing When to Shine
Now, it’s time to select from the dropdowns the range of sections in which our evaluations will be visible.
And now we have the “Add to statistics when triggered” toggle. This means that the result of the evaluations is added to the data table in the reporting (with the inserted value). This is useful when you have multiple “ends” of a bot and you want to add that information in the reporting, however, we won’t need it this time.
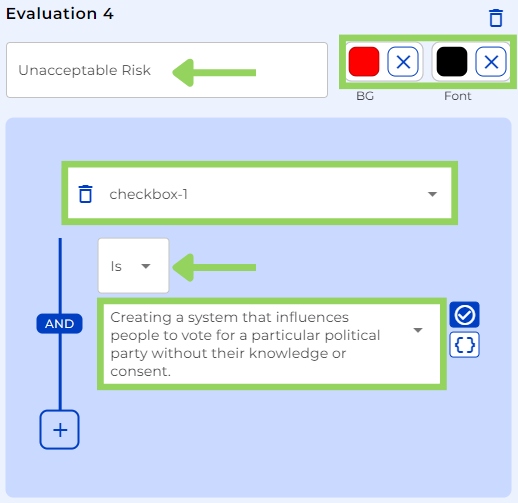
Step 6: Risk Level Rumble
Let’s create evaluations for different risk levels. In our case, we’ll have four: minimal, limited, high, and unacceptable risk! This step should be repeated for each evaluation with its own specifications.
We can also give a name to each evaluation and select their font and background colors when active.
Time to use dropdowns to define the conditions that trigger each evaluation. Select the variable, the range, and either a number, another variable or an option from the checkbox. Bear in mind that for this example we have predefined choices, but you can let your creativity flow.
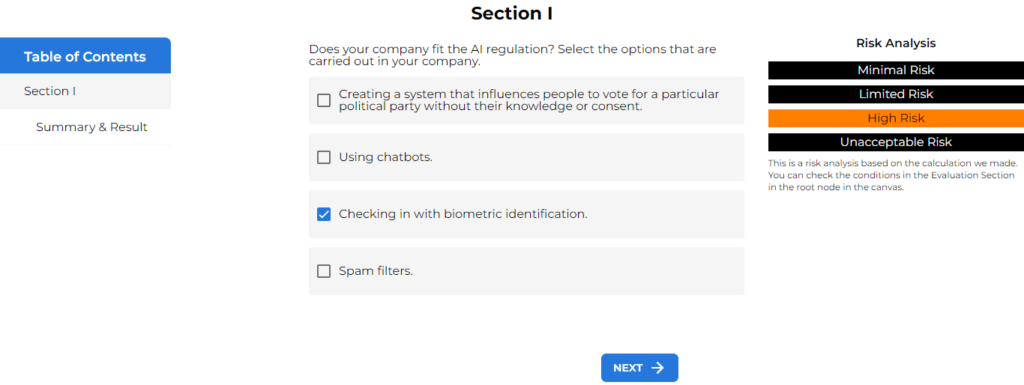
Step 7: See It in Action!
Finally, click “Preview” and choose an option from the checkbox to see your evaluations in action guiding the user towards informed decision-making.
Don’t be afraid to get creative with your evaluations! The more informative they are, the better your users will understand the choices they’re making.
Happy evaluating with e!