Today, we’ll navigate the creation process of your own Environmental, Social and Governance (ESG from now on) Policy. Let’s dive in!
Step 1: Naming Your Masterpiece
First things first, give your bot a catchy name and a short description (just for your internal reference, users won’t see it).

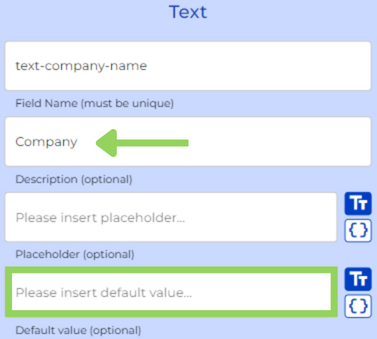
Step 2: Company Name
Let’s add a “Text” node. This will allow users to type their company’s name at the front-end. Keep the description simple, like “Company Name.”
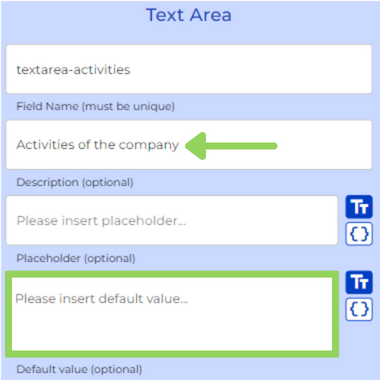
Step 3: Describing Your Company’s Doings
Moving on to company info, the next node is a “Text Area.” Here, users can elaborate on their company’s activities. That’s why the description reads “Company Activities.”
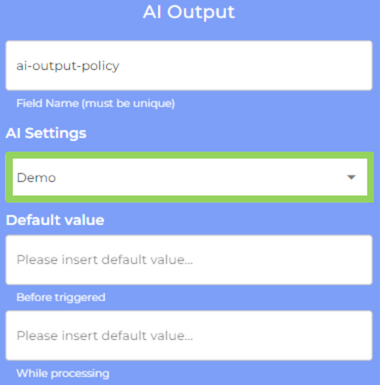
Step 4: The AI Begins!
Time to unleash the power of AI with an “AI Output” node. Start by choosing the AI settings (we left the default values empty in this case).
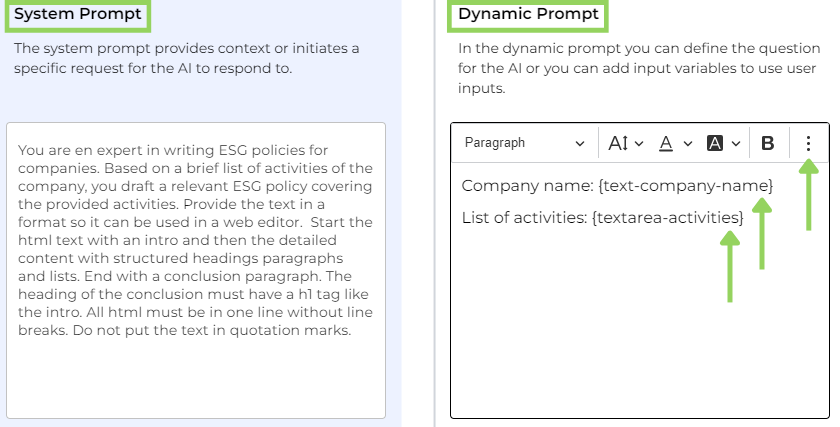
Now, for the tricky part – prompting! In the “System Prompt,” provide context for the AI. The “Dynamic Prompt” lets you define the question using the three-dot menu and selecting variables. Don’t worry, we’ll show you the exact prompts in the explanatory text below.
To wrap up this node, choose “With dedicated button” from the first dropdown to trigger the AI. From the second dropdown, select “Never” to prevent re-triggering. Finally, in the placeholder, name your AI trigger button, like “Create Policy.”

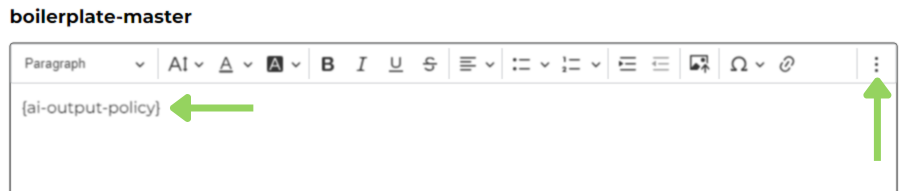
Step 5: Building the Policy Foundation
Here comes the “Boilerplate” node. This is an Input Node designed to help you create reusable text templates within your Bot. These boilerplates can be integrated into documents, emails, or text fields, and serve as flexible variables for your Bot.
Let’s edit the Boilerplate by clicking on the three-dot menu and selecting the AI Output variable.
Step 6: Exporting Your Masterpiece
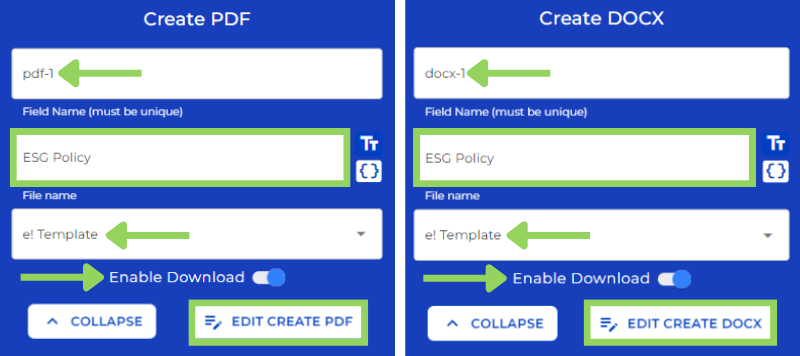
Now, we’ll add both a “Create PDF” and a “Create DOCX” node. Both follow the same steps:
- File Name: Give your document a title.
- Template Selection: Choose the template you like best (we went with the e! Template in this example).
- Enable “Enable Download” to allow users to save their creation.
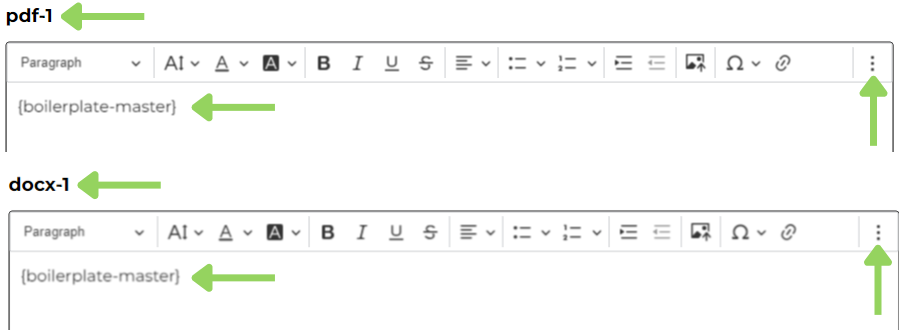
Remember to edit the document by clicking on the three-dot menu and selecting the Boilerplate variable.
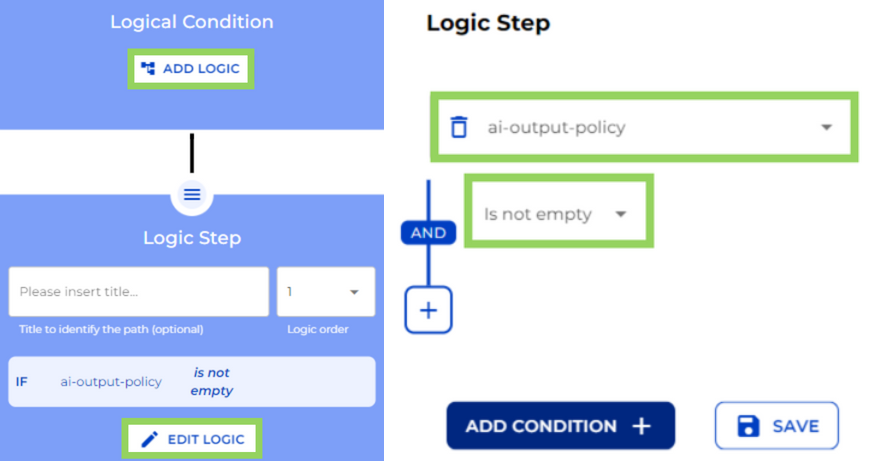
Step 7: Logical Condition
We’ll integrate a “Logical Condition” node here. Edit its logic by selecting the AI output variable from the first dropdown and “is not empty” from the second dropdown.
Step 8: Showcasing Your Work
To display your creation on the front-end, add a “Text Field” node. Edit it by clicking on the three-dot menu and choosing the Boilerplate variable.

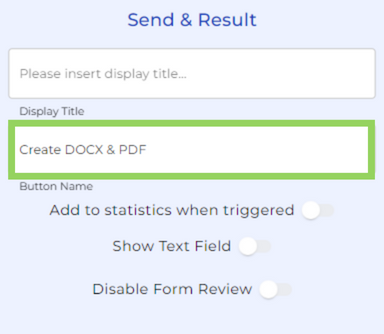
Step 9: Saving the Day (and Your Policy!)
The final node: “Send & Result.” This marks the end of the path. Users can click a button (we named it “Create DOCX & PDF”) to save their documents for future reference.
Feel free to click “PREVIEW” to test your creation before unleashing it on the world.
Step 10: Witness the Magic (Front-End Edition!)
Now, on the front-end, users can type their company name and detail their activities. Once that’s done, click “Craft My Policy” and watch the AI weave its magic, generating your ESG policy in seconds. You can even save this masterpiece by clicking the “Create DOCX & PDF” button.
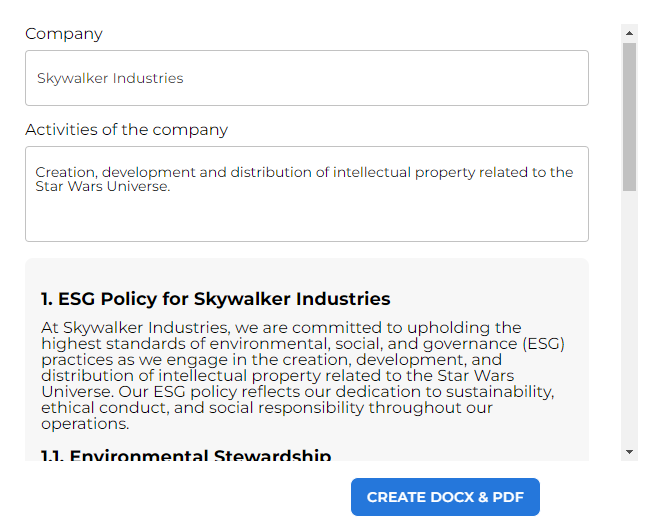
And voila! Your very own ESG policy, built with the help of e!
Happy automating!