This is your guide to mastering the AI sentiment analysis demo. This nifty tool will rank your text on a scale of 1 (very negative) to 10 (very positive). Ready to dive in?
Step 1: Naming Your Masterpiece
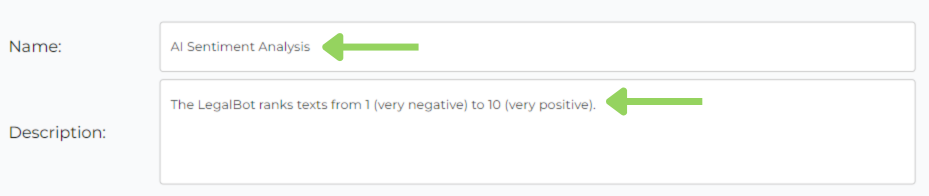
First things first, let’s give your bot a catchy name and a quick description of what it does.
Step 2: Textual Terrain
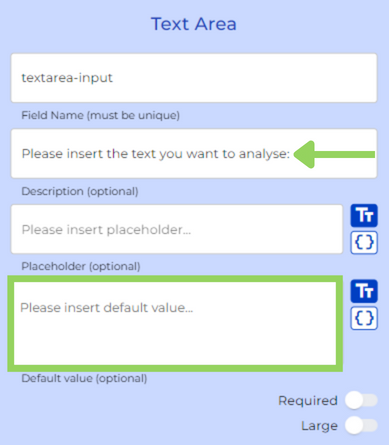
Now, we’ll add a “Text Area” node. This is your playground for pasting or writing the text you want to analyze. Give it a clear title to guide your users.
Step 3: The AI Whisperer
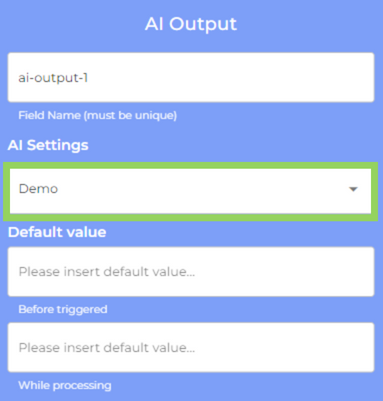
Here comes the magic! We’ll add an AI Output node. Choose the AI settings from the dropdown menu. This time, we’ll leave the default values blank.
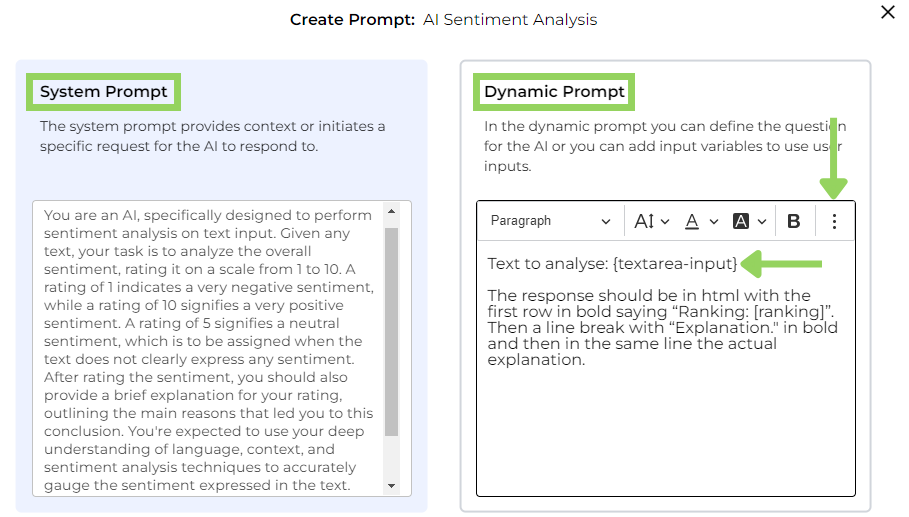
Now, for the fun part: the prompt. This tells the AI what to look for in your text. In the system prompt, you’ll explain the context. Then, in the dynamic prompt, you’ll use the three-dot menu to add variables.
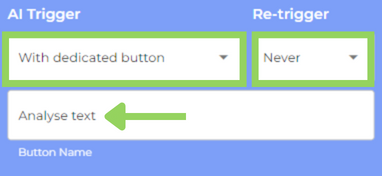
Finally, you get to choose when the AI triggers. Pick “with a specific button” from the first dropdown menu, then “Never” for the second one to prevent accidental re-triggering. Give your button a clear name, like “Analyze Text,” to keep things user-friendly.
Step 4: Results Revealed!
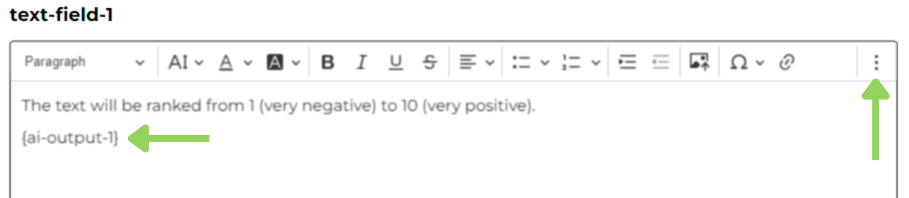
Time to showcase the AI’s insights! We’ll add a Text Field node. Click the three-dot menu and add the AI Output variable to display the analysis.
Step 5: Let’s Get Analyzing!
Head over to the “PREVIEW” mode to test your creation. On the user interface, you’ll be able to paste or type your text, then click the “Analyze Text” button. In seconds, you’ll have your sentiment score!

And here you have it! Happy automating with e!