Send & Result Node: Close Bots & Display Results in e!
Set up the Send & Result node in e! to save client inputs, show conditional result screens, and close every legal bot path with a custom send button.
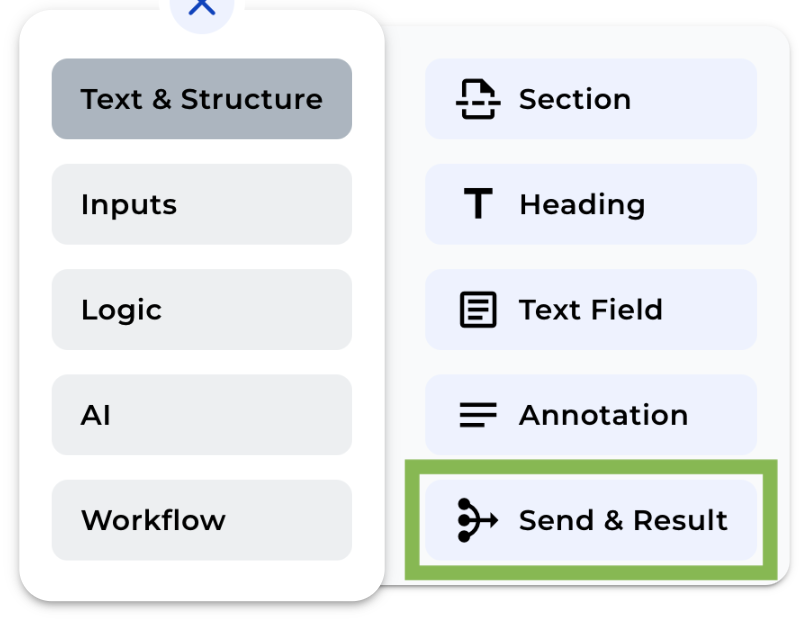
Send & Result
The Send and Result Node is essential for saving client input and displaying results. By adding this node to your Bot, your client’s input is saved in the database and made accessible through the Statistics Dashboard. This Node always marks the end of a path in the Bot, and can be used to display results or relay messages to your clients upon completion of their inputs. For displaying text based on conditions along the bot, consider using the Text Field Node.
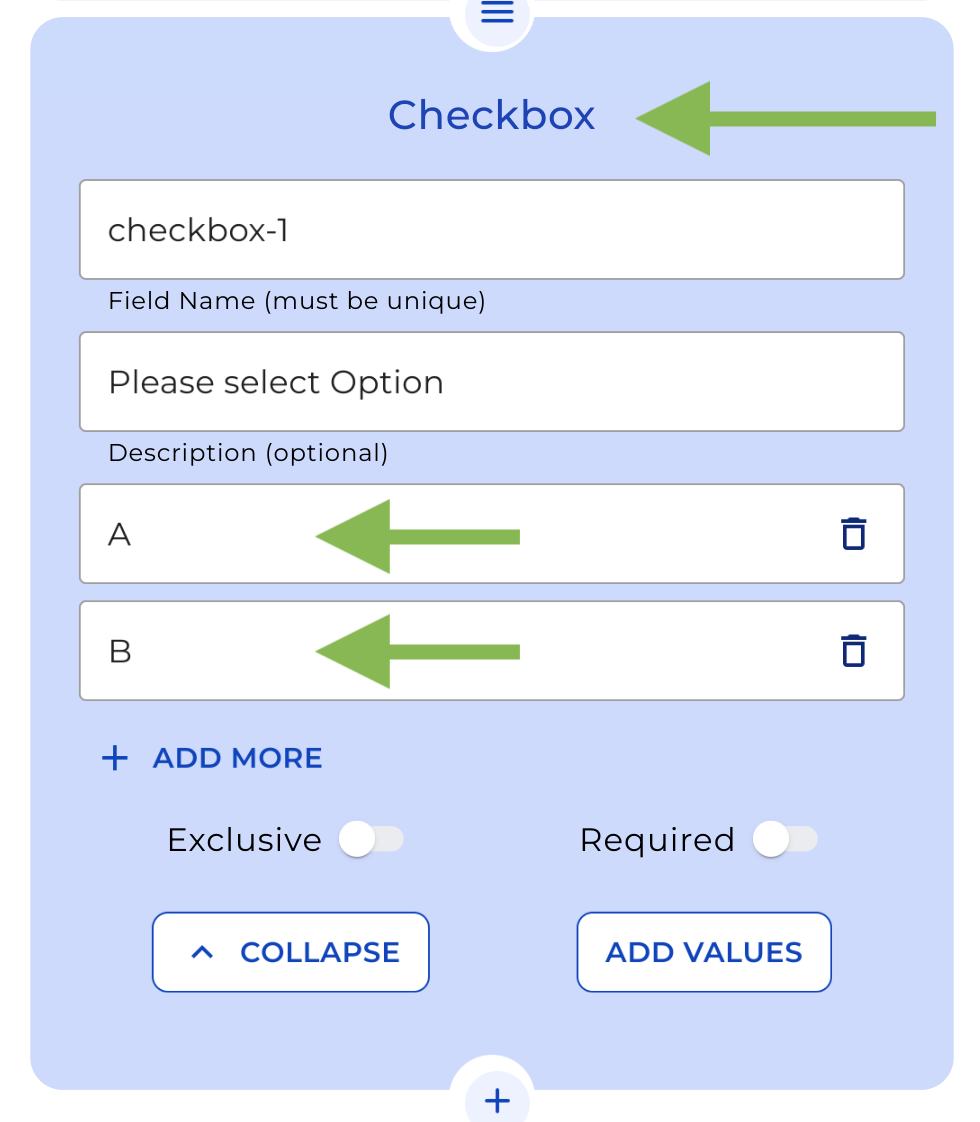
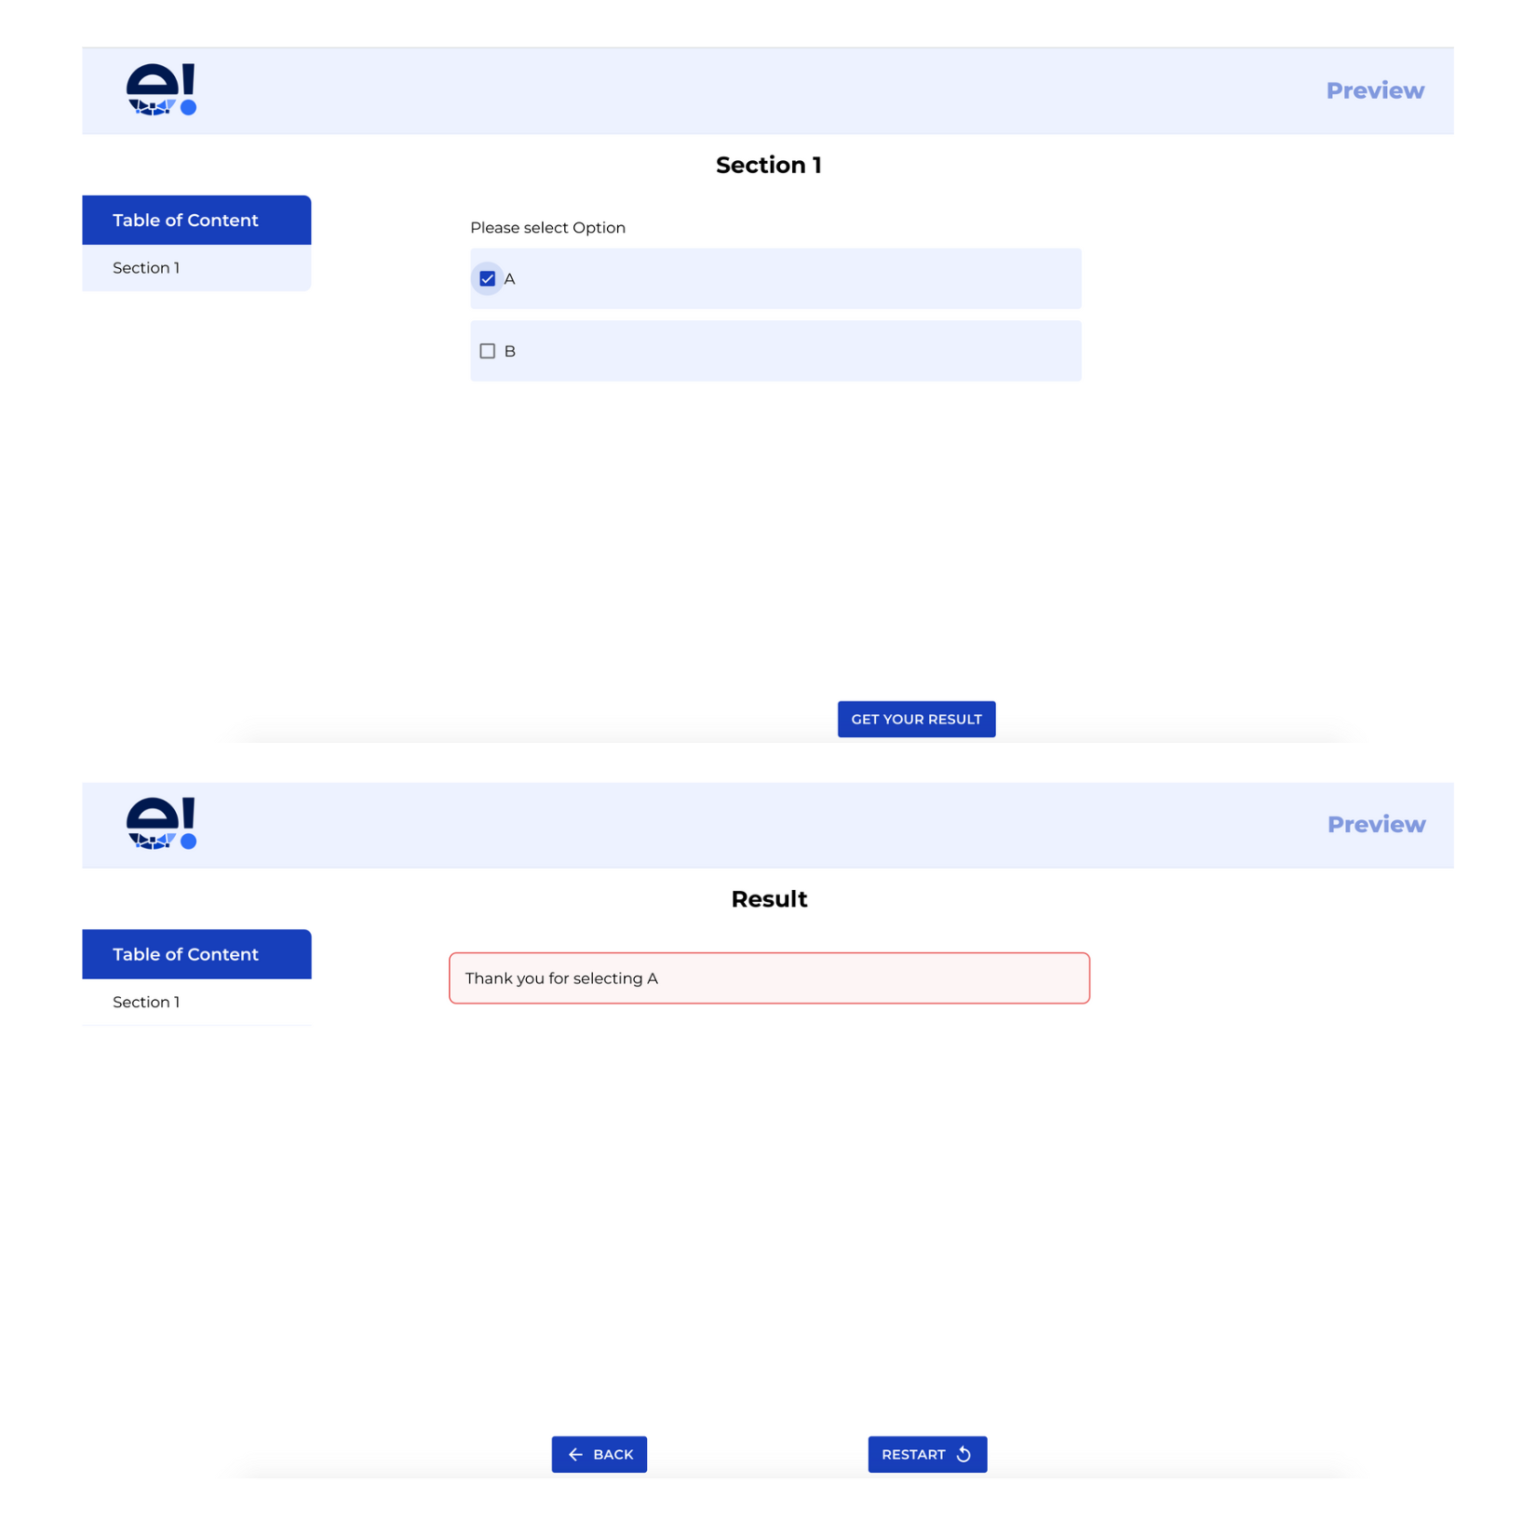
To demonstrate how the Send & Result Node works, we’ll walk through a simple example with a Checkbox Node that has two options, “A” and “B.” We’ll show different results in the front end depending on the user’s selection.
Step 1: Add a Send & Result Node for the First Logic Step (Option “A”)
Start by adding a Send & Result Node for the first logical step when the user selects “A.” You may add a title to the node, which will be displayed as a header on the result page in the front end.
Step 2: Set the “Send Button” Text
Define the text for the “Send Button” that users will click at the end of the Legal Bot. For this example, we’ll use “Get your result” as the button name.
Step 3: Show the result in Statistics
If you want to include the result of this node in your statistics, switch on this option and insert a name for this specific result to be identified in the statistics section.
Step 4: Configure the Text Field
Since we want to display a result, select “Text Field” and customize the border type and text colour within the Send & Result Node.
Step 5: Create the Result Node Text
Click “Create” to craft the text for the Result Node, and then save it. You can disable the option for users to review their inputs by toggling “Disable Form Review.”
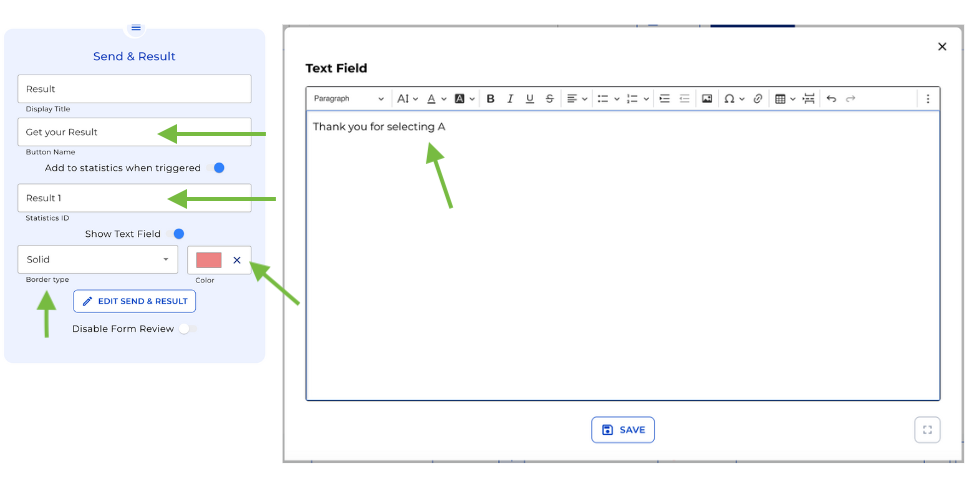
Send & Result node options for A
Step 6: Set Up the Second Path (Option “B”)
Copy the node, paste it into the second Logic Step, and change the colour of the second Result Node to differentiate it in the front end.
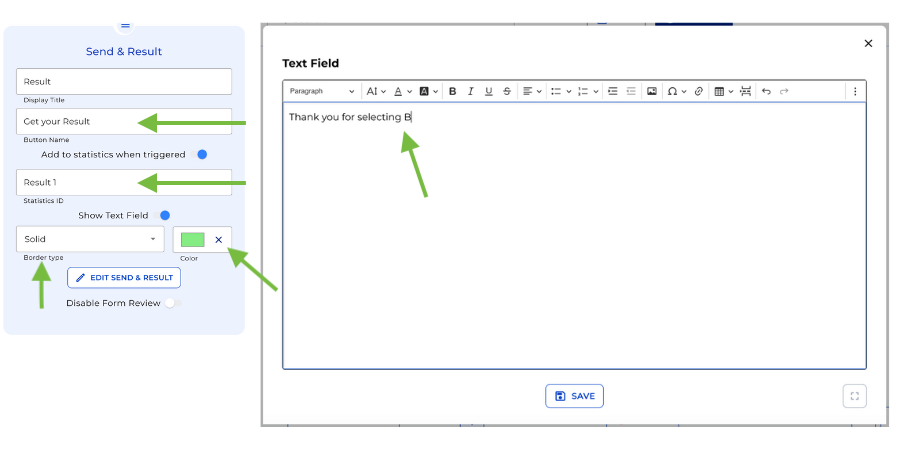
Send & Result node options for B
Step 7: Preview the Send & Result Nodes
Click the “Preview” button in the header menu to see the Send & Result Nodes in action. In the front end, select “A” and click “Get your result” displays the first result, while selecting “B” triggers the second Result Node with a different colour.

And that’s it! With the Send & Result Node, you can effortlessly save client inputs and display results based on their choices.