Clause Manager
Auto-Populate Legal Clauses with the Clause Manager Node
Learn how to insert a Clause Manager node into your Legal Bot, map dynamic placeholders to user inputs, and auto-populate legal clauses in real time. No coding needed.
Clause Manager Node
Hello and Welcome to another tutorial!
In the Clause Manager Function tutorial we learned about what Clause manager is and how it can be useful to different business functions. If you have not seen that tutorial, you can check it out here.
Today, we’ll walk you through integrating a Clause Manager node, turning your clauses into dynamic tools for your users.
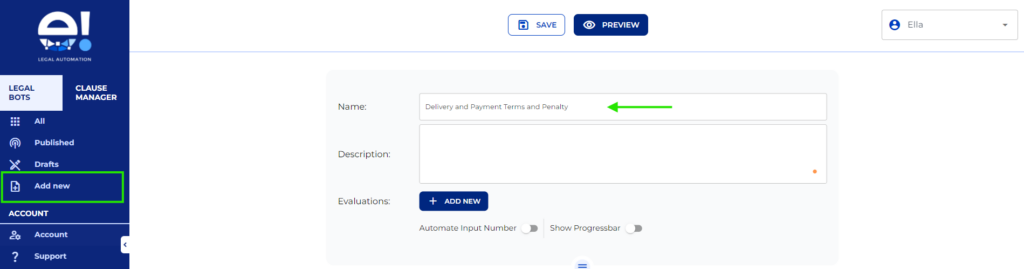
Step 1: Start Your Clause Setup
- Click “Add New” to begin creating your clause.
- Name it “Delivery and Payment Terms” to easily identify it later.
- Add a brief description explaining its use.
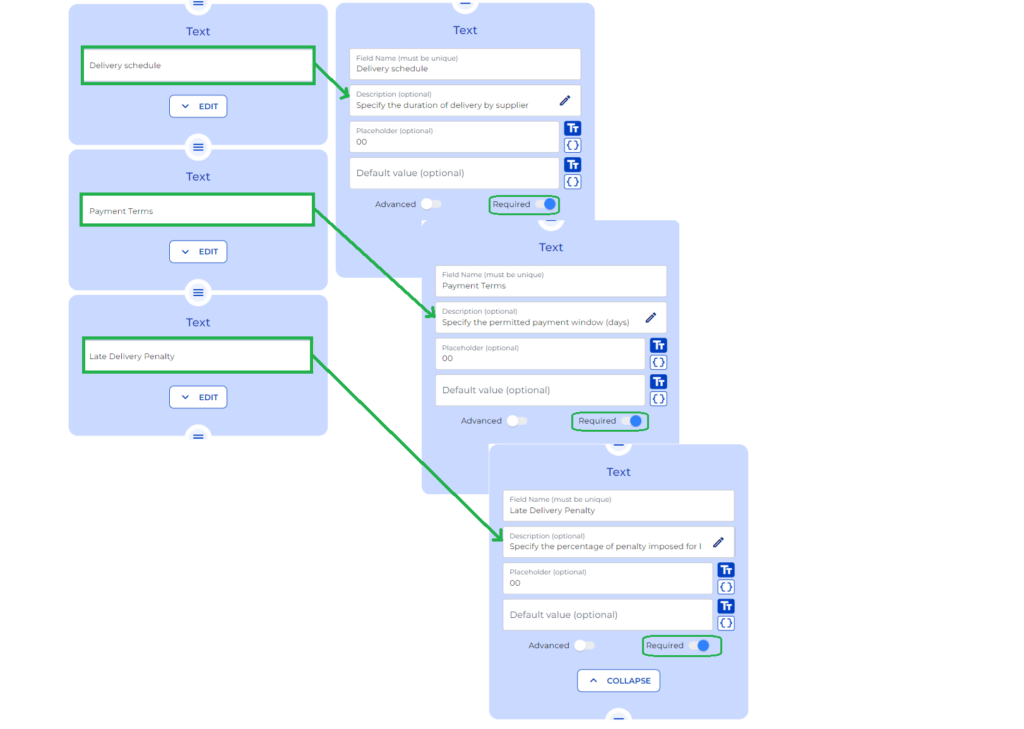
Step 2: Identify Clause Sections and add Text Node
- Our example contains three sections: Delivery Schedule, Payment Terms, and Late Delivery Penalty. Create three text fields where clients can enter the necessary data for each section of the clause.
- Include relevant Information to ensure that each text field corresponds to the appropriate section: delivery schedule details, payment terms, and late penalty percentages.
- Toggle on the Required option for all text nodes to avoid potential errors during the process.
Step 3: Link to the Clause and Map Dynamic Fields
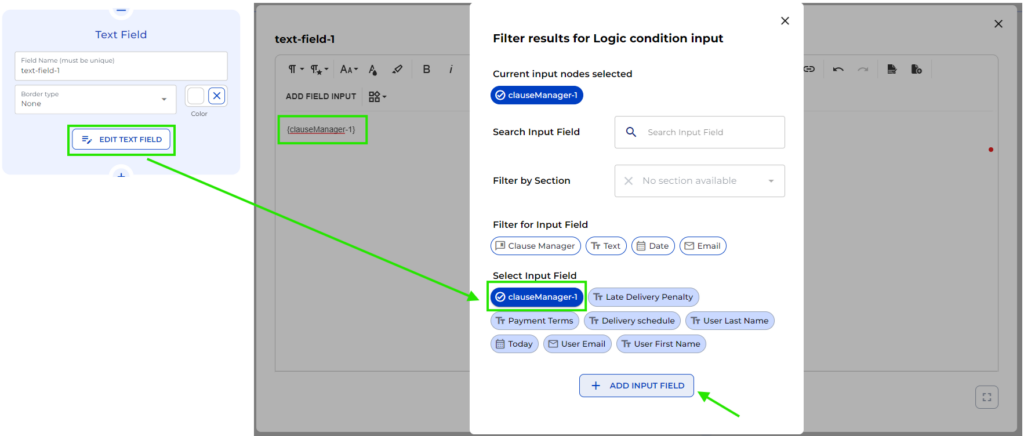
- From the Inputs menu, select Clause Manager and add the appropriate clause.
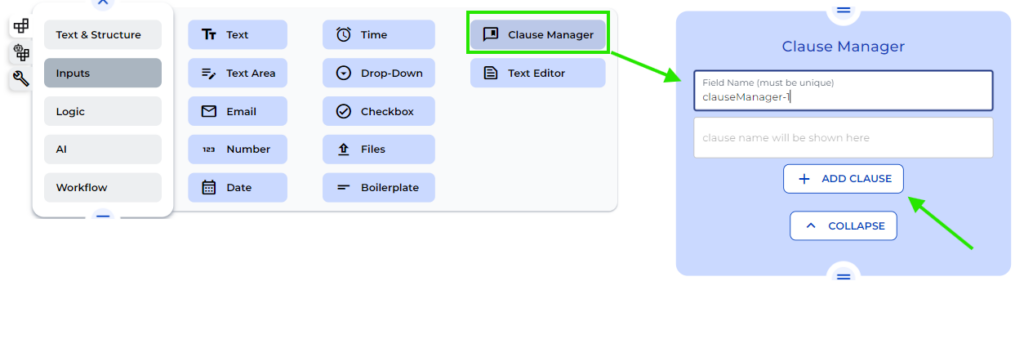
- Filter the specific clause using the filter tool and add the Clause.

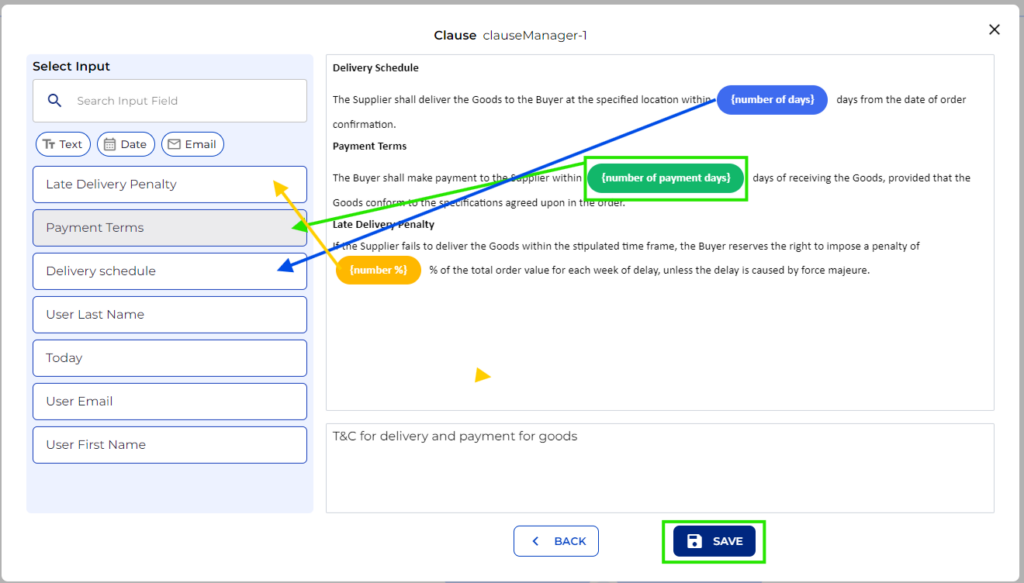
- Identify fields like Delivery Schedule and Payment Terms and Late Delivery Penalty that need to be dynamic and link placeholders to your input fields. Notice that the unlinked fields are Yellow, once you select the field it turns green and as soon as the field is linked, it turns blue. Once all mapped, Save the changes.
Step 4: Finalise Setup with a Text field Node
- Add a Text Field node to display inputs on the frontend.
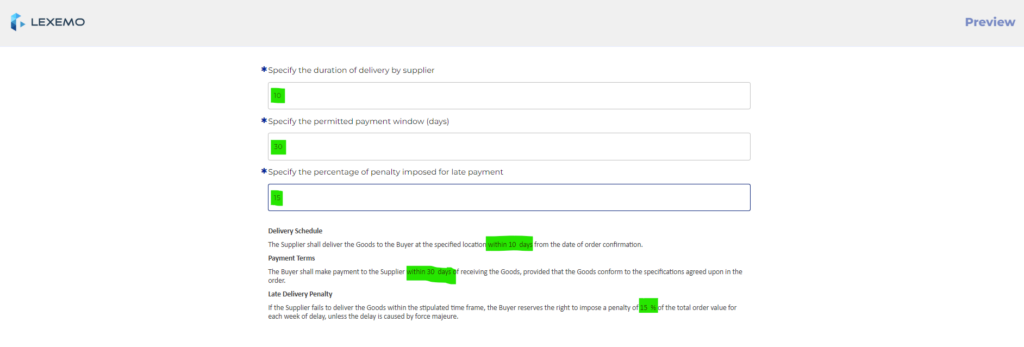
Step 5: Preview and Test
- Test your bot by entering example data in your form fields (e.g., delivery time, payment windows) and watch the bot populate your clause dynamically.