Clause Manager: Create & Manage Reusable Legal Clauses
Learn how to create, tag, version, and publish reusable legal clauses with the Clause Manager in e! — the central library powering your Legal Bots.
Clause Manager Function
(The video starts with explaining the common use cases of Clause Manager function in various business units and the tutorial starts at 01:04)
Welcome back to another tutorial!
In this tutorial, we examine the clause manager function, a versatile tool that boosts efficiency, compliance, and document management across various industries. Clause manager is especially beneficial for law firms and legal departments, as it streamlines the creation and standardization of contract clauses, ensuring consistency and legal compliance.
HR departments can utilize clause management to effectively handle policies and employment contracts, maintaining accurate documentation vital for employee relations. Additionally, sales teams benefit by customizing clauses in sales agreements for different clients or regions, enhancing customer satisfaction and business adaptability.
Now, let’s jump right in and create a clause.
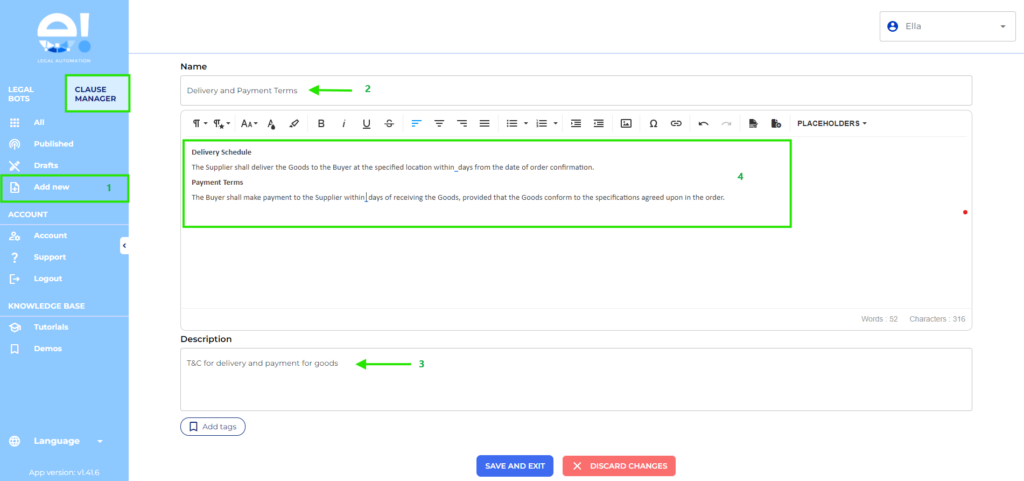
Step 1: Create a New Clause
As always, let’s start by creating a new clause that will serve as the foundation for our document management.
- Click on “Add New”: Begin by clicking the “Add New” button to initiate the creation of your clause.
- Name Your Clause: Enter a descriptive name for your clause. For example, we have called it “Delivery and Payment Terms” for our example. This name will help you easily identify the clause later.
- Add a Description: In the description section, provide a brief explanation of what the clause is used for. This serves as a helpful reference for anyone reviewing the clause in the future.
- Write Your Clause: Start drafting your clause in the text section. Ensure that it is clear and comprehensive, covering all necessary details.
Step 2: Add Dynamic Placeholders
To enhance the functionality of your clause, we need to incorporate dynamic elements.
- Identify Variables: Recognize that certain elements within your clause, such as Delivery Schedule and Payment Terms, should be dynamic to allow for flexibility.
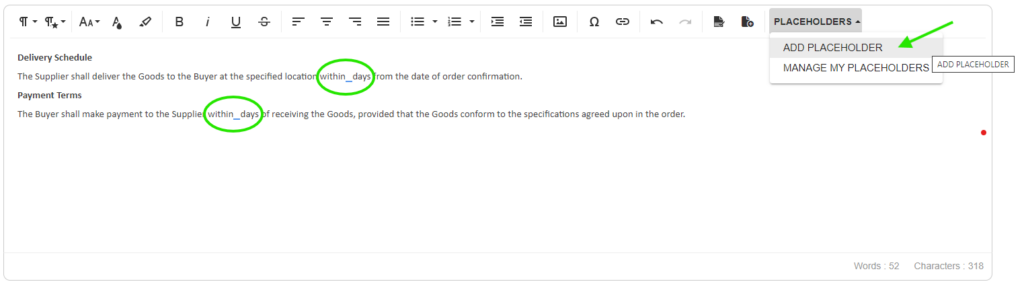
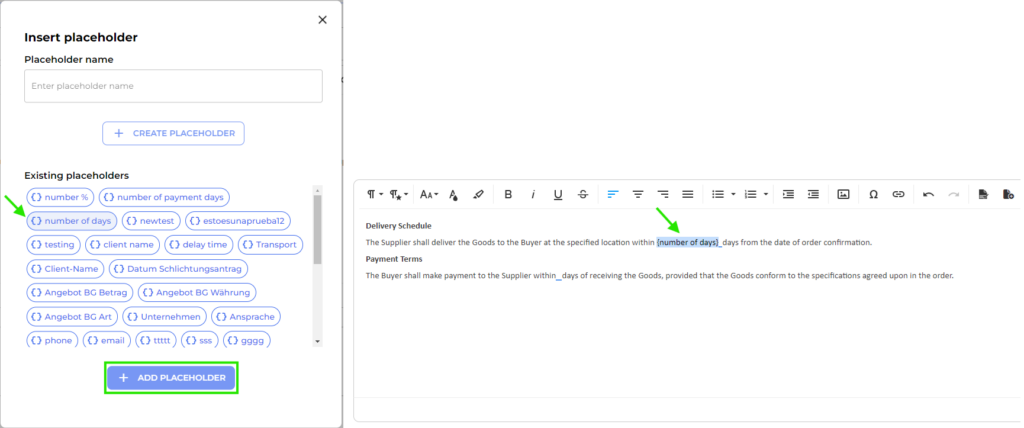
Add Placeholders
- If the placeholder you need already exists in the list, simply select it and click “Add Placeholder.”
- If it doesn’t exist, you can create it by typing the placeholder’s name and pressing the “Create Placeholder” button. The new placeholder will then appear in the list below for you to select and add to your clause.
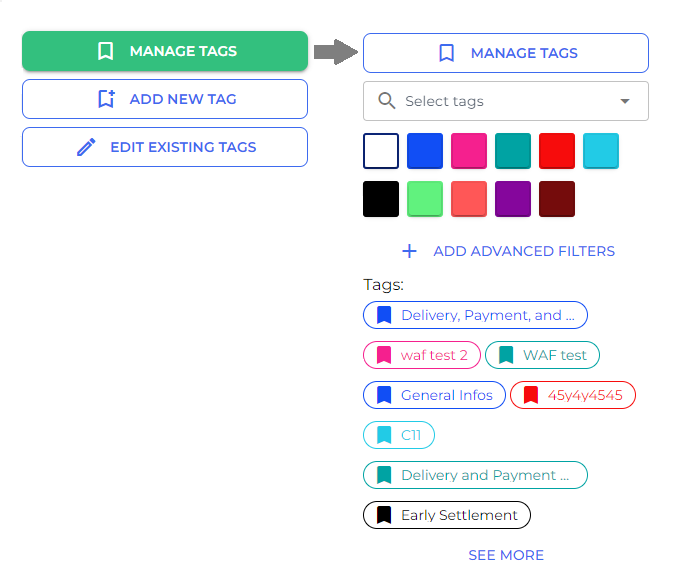
Step 3: Tag Your Clause
Organizing your clauses with tags will make them easier to locate later.
- Add Relevant Tags: Once you have finished editing your clause, add relevant tags that will help you filter and navigate through your saved clauses efficiently.
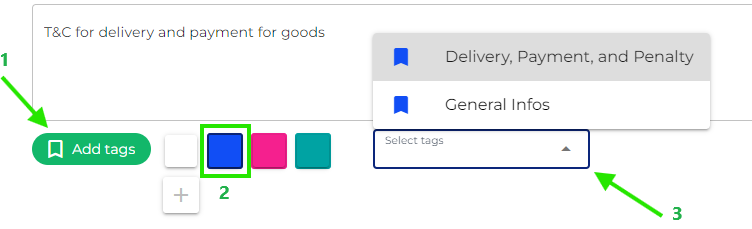
Explore the Tags Section and take a moment to look at the variety of tags and colors available for selection. These tags serve as an excellent referencing method for browsing your clauses with ease.
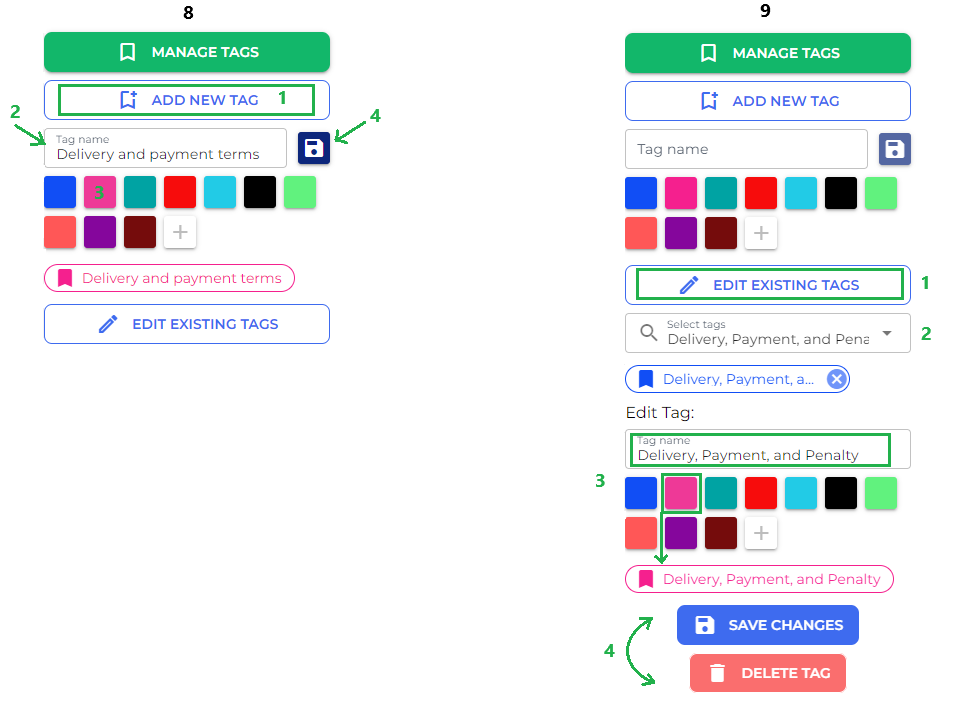
Create New Tags
- If this is your first time creating tags, click on “Add New Tags.”
- Give your tag a descriptive name and select a color that makes it easily identifiable.
- After you’re satisfied with your tag, click “Save.”
Edit Existing Tags
- If you need to make changes to any existing tags, simply select the tag you wish to modify, click on the pencil icon, and update both the name and color as needed.
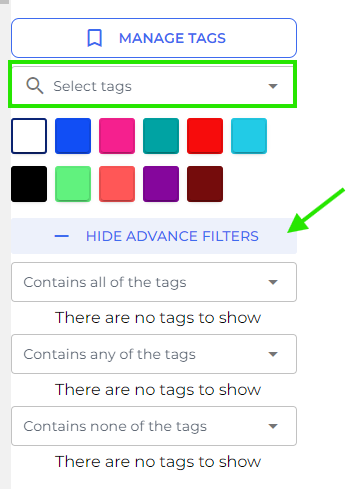
Step 4: Search and Manage Tags
Efficiently managing your tags will streamline your workflow.
- Search for Tags: Utilize the search function to find tags by name or color. You can also use advanced filters for more precise searches.
- Manage Tags: Access the “Manage Tags” option for further customization of your tagging system.
Step 5: Save Your Clause
Now that everything is set up, it’s time to save your work.
- Save and Exit: After entering all necessary information and selecting your tags, click “Save” to store your clause.
- Draft Mode Notification: Your newly created clause will be in Draft mode, indicated by a blue button, signaling that it is not yet published.
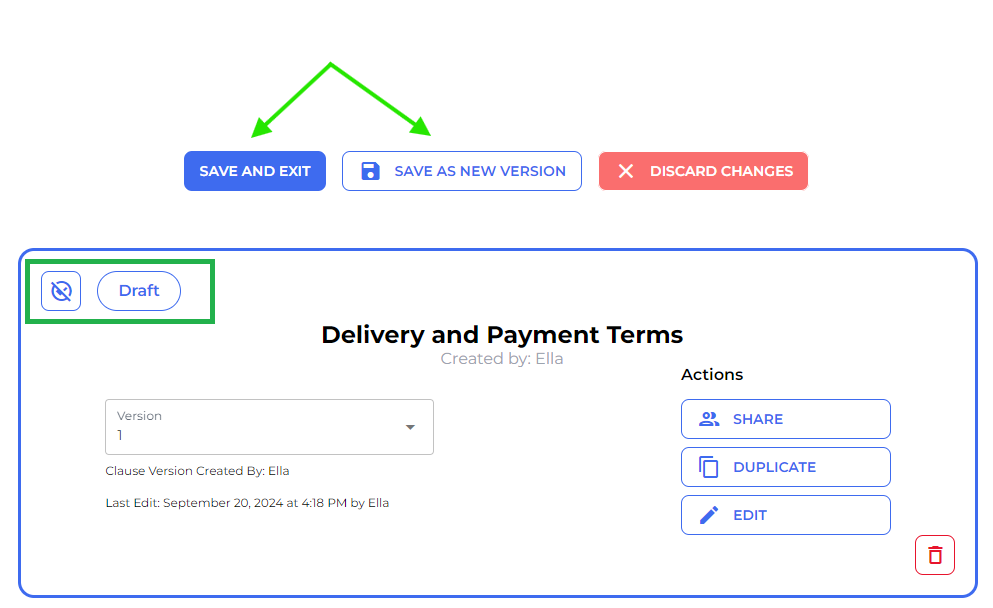
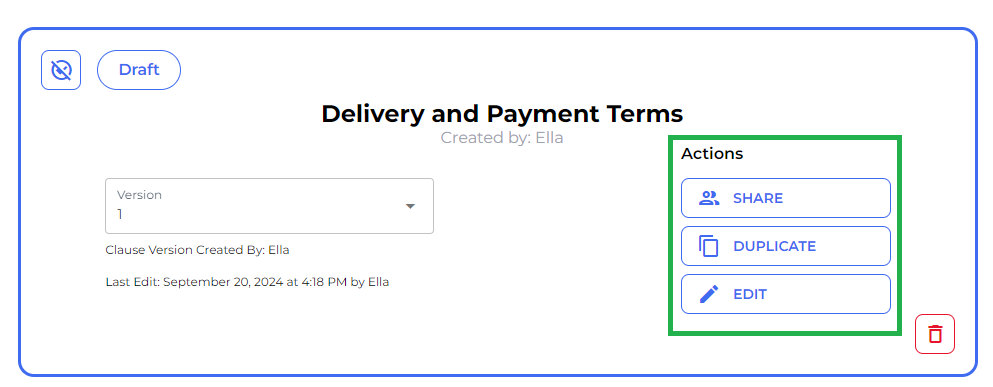
Step 6: Share or Edit Your Clause
If collaboration is needed, this step allows you to share or refine your work further.
- Share Clause: If you want someone else to contribute to this clause, you can share it with them at this stage.
- Duplicate or Edit Further: Should you need to make additional edits or create a duplicate of this clause for another purpose, you have those options available.
Step 7: Publish Your Clause
Once you’re satisfied with your clause, it’s time to make it accessible company-wide.
- Publish Clause: Click on the “Publish” button when ready and select “Confirm.” This action will make your clause available across the company account for others to use.

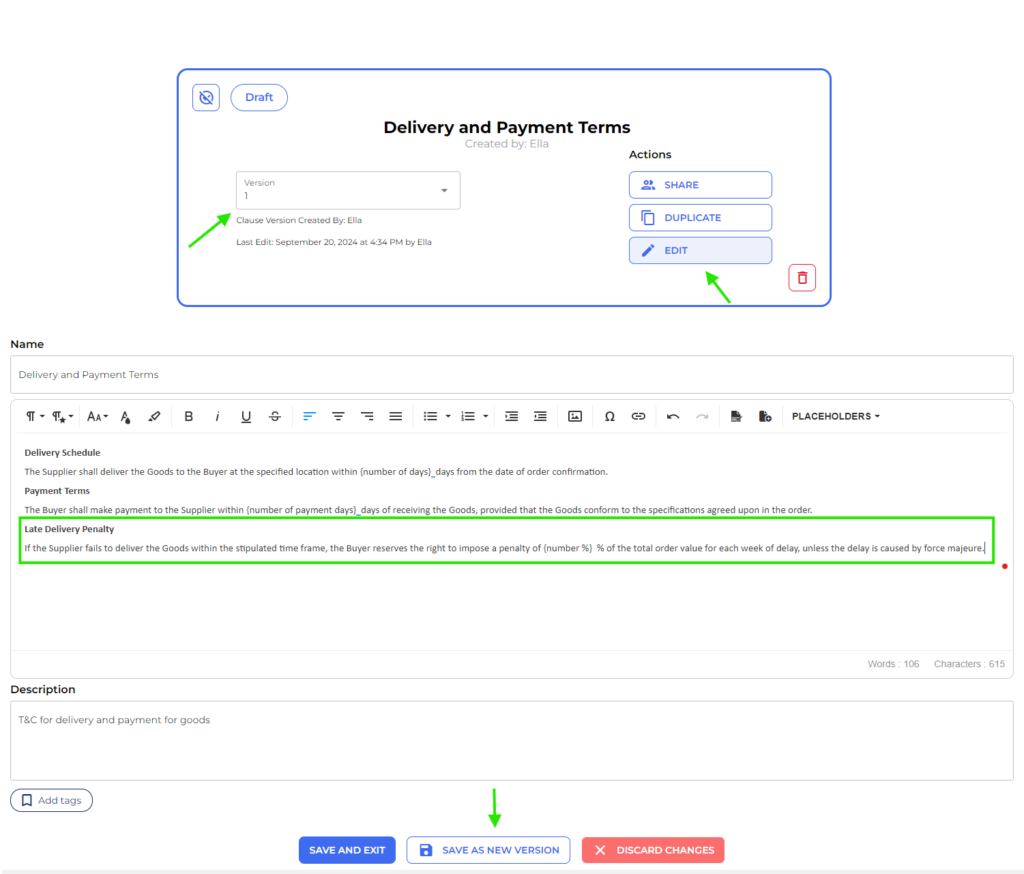
Step 8: Edit Existing Clauses
If updates are necessary after publishing, follow these steps:
- Edit Clause: To add further information or make changes, click “Edit” and follow similar steps as before.
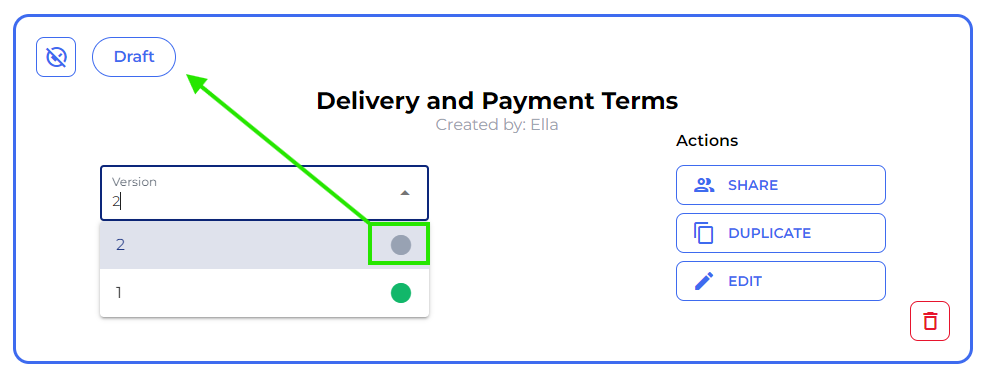
- Save as New Version: Once you’re happy with the changes made, select “Save as New Version.” You’ll see that version 2 has now appeared in the Version dropdown menu.
Step 9: Manage Versions
Keep track of different iterations of your clauses easily.
- Select Version: You can always choose from previous versions using the dropdown menu if you need to revert back to an earlier iteration.
- Draft Mode Indication: Remember that any version still in draft mode will be indicated by a gray button.
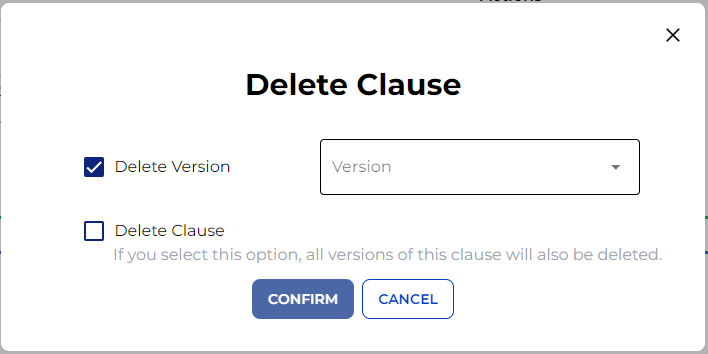
Step 10: Deleting Clauses
If you decide that a clause is no longer needed, here’s how to remove it:
- Delete Options: When deleting a clause, you’ll have two choices: delete a specific version or remove the entire clause altogether.
And there you have it! A detailed guide on utilizing Clause Manager effectively!