Microsoft Graph API: Save Legal Docs to SharePoint with e!
Learn how to use Microsoft Graph API in e! to auto-save generated NDAs as PDF and DOCX to SharePoint and populate Excel with contract data — no code needed.
API Connectors-Microsoft Graph
Today, we’re going to explore the powerful capabilities of API Connectors, specifically focusing on Microsoft Graph. In previous videos, of API Connector – Part 1 and Part 2 we discussed how to integrate the AccuWeather API to automate weather forecasts. Now, we’ll shift our attention to Microsoft Graph, which offers versatile applications for managing data within Microsoft 365.
Microsoft Graph API Connectors enable organizations to seamlessly integrate external data sources into their Microsoft 365 applications. This integration allows users to access and discover content from platforms like Salesforce and ServiceNow directly within tools such as Microsoft Search and Copilot. Common use cases include enhancing search capabilities and improving workflow efficiencies by connecting various systems.
Setting Up the API Connector
To get started, we need to add the API Connector to our account and configure its essential components:
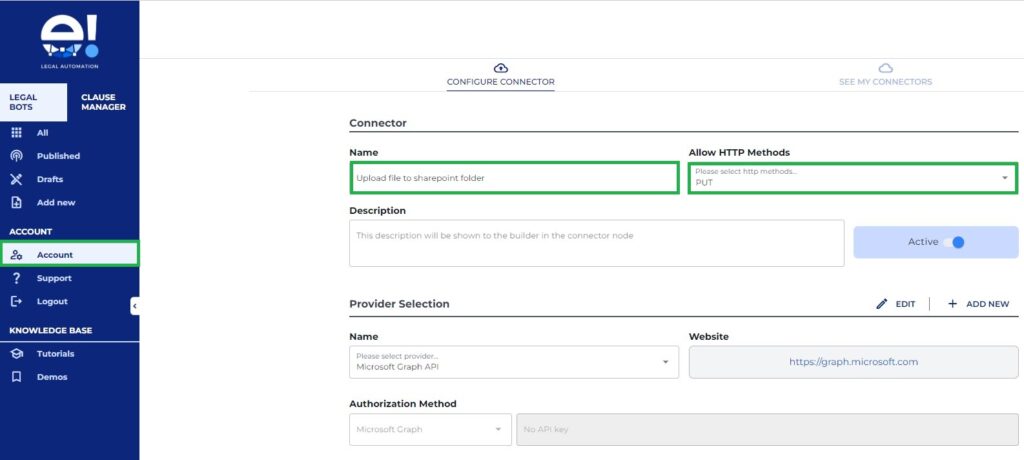
Step 1: Add the API Connector
- Access Your Account: Log into your account.
- Navigate to API Connectors: Go to the API Connectors section.
- Add New Connector: Click on “Add Connector” and provide a name for your connector.
- Select HTTP Method: Choose PUT as the HTTP method since this API is for uploading files to SharePoint.
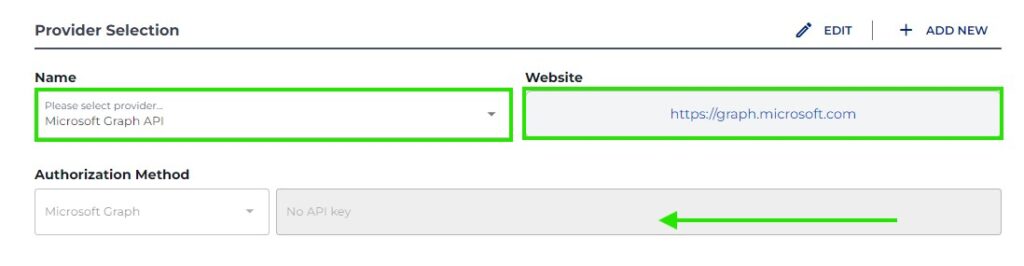
Step 2: Provider Selection
- Enter Provider Website: Input the URL of the provider you are integrating with.
- Authorization Method: Leave this field empty for now.
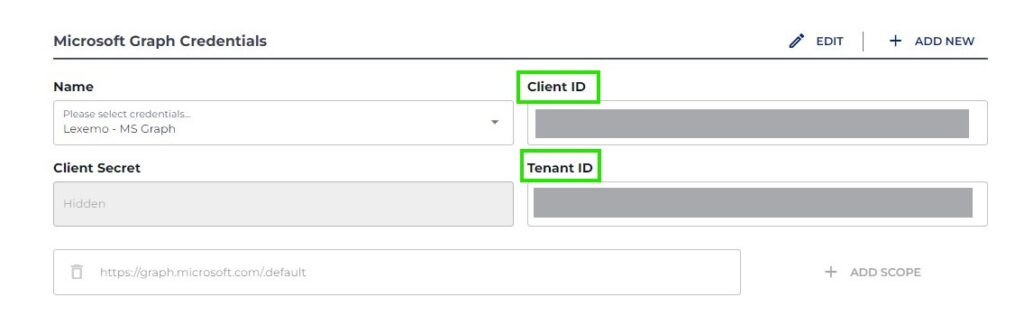
Step 3: Input Credentials
- Client ID and Tenant ID: Enter your unique Client ID and Tenant ID associated with your business account.
Step 4: Endpoint Configuration
- Name Your Endpoint: Assign a name, such as “Upload file to SharePoint folder.”
- Paste URL for Configuration: Ensure the URL contains a semicolon after the file name for parameter separation.

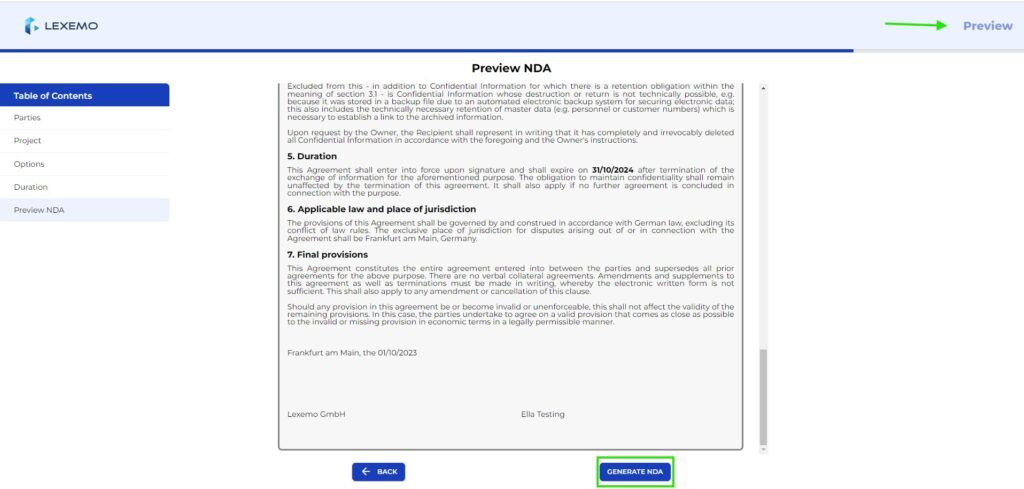
Step 5: Preview the Bot Functionality and Check Generated Files
- Preview Page Setup: Use the Preview page to visualize how the bot generates the NDA. Once completed, the NDA can be saved in a designated SharePoint folder.
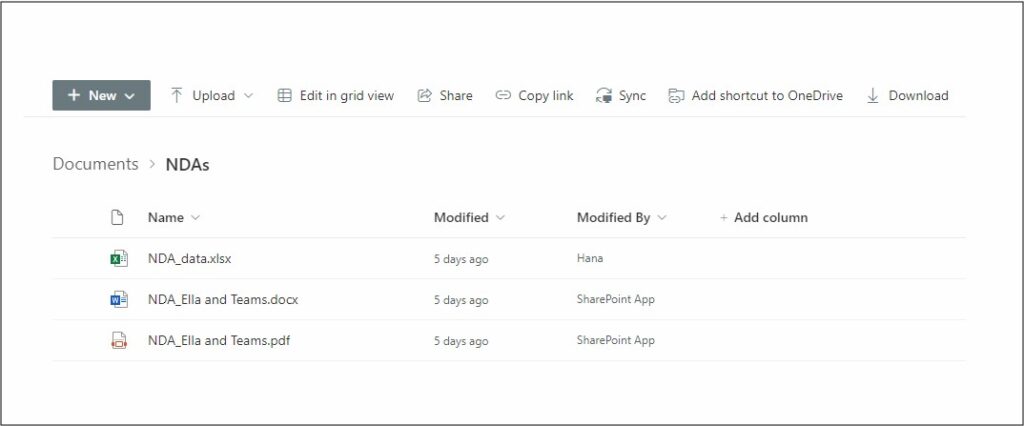
- Save Generated NDA: Navigate to the selected SharePoint folder to confirm that the generated NDA is saved in both PDF and Doc-X formats, along with an Excel file populated with information extracted from the NDAs.
Now let’s open the builder’s interface to view how the automation for generating NDAs is structured.
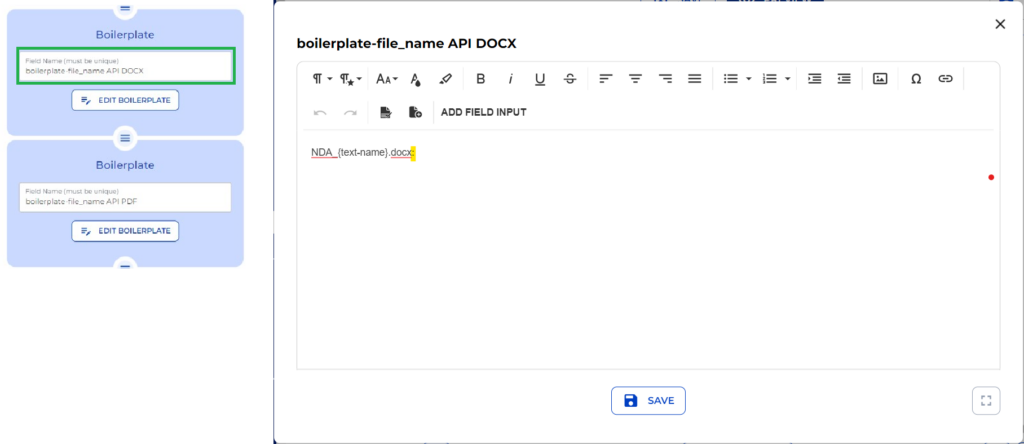
Step 6: Utilize Boilerplate Nodes to define naming conventions for saved files
Remember that a semicolon must follow each file name when saving to SharePoint.
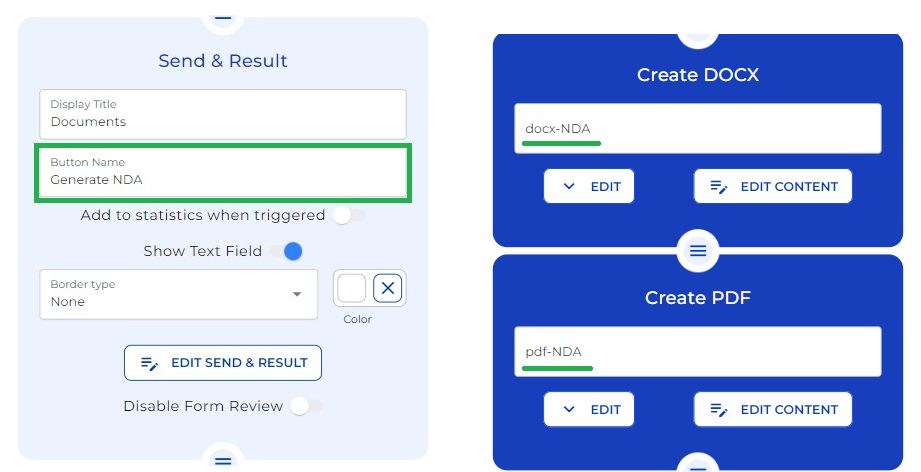
Step 7: Set up the Generate NDA function and automate document generation
- The task of generating files is executed by the Send & Result node. Upon activation, it triggers four additional nodes simultaneously.
- Add and configure Document Creation Nodes
– Create Doc-X Node: Generates the NDA in Doc-X format.
– Create PDF Node: Generates the NDA in PDF format.
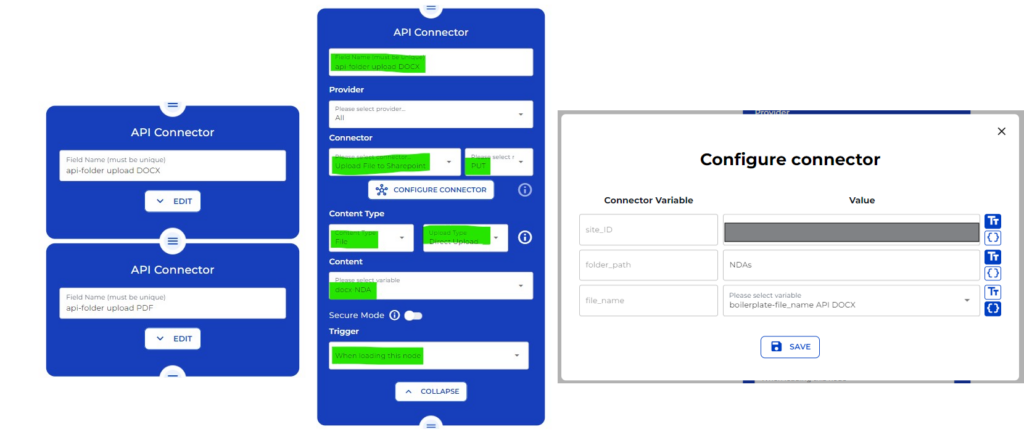
Step 8: Configure API Connector Nodes
- Add an API connector specific to each file type:
- For Doc-X: Set method to “Upload file to SharePoint” using PUT.
- For PDF: Similar settings apply; ensure that file names are correctly assigned.
- Configure the API settings by
– Define Folder Path and File Name
– Input your unique Site-ID and set content type as File.
– For uploads, select “direct upload” with content specified as “Doc-X NDA” or “PDF NDA”. - Set triggers for both API connectors to run simultaneously when loading their respective nodes.
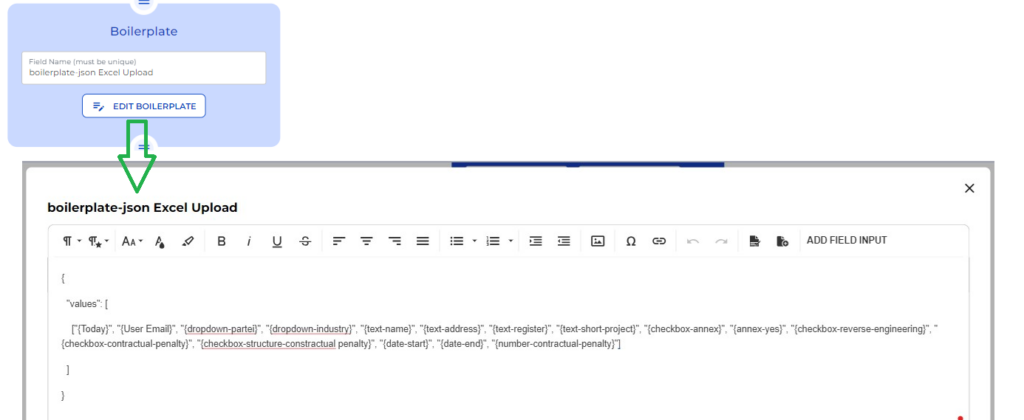
Step 9: Excel File Population
To populate the Excel file with consumer inputs from the NDA:
- Use a boilerplate node for uploading data to Excel.
- Ensure that parameters in “Add Field Input” match exactly with Excel columns for accurate data transfer.
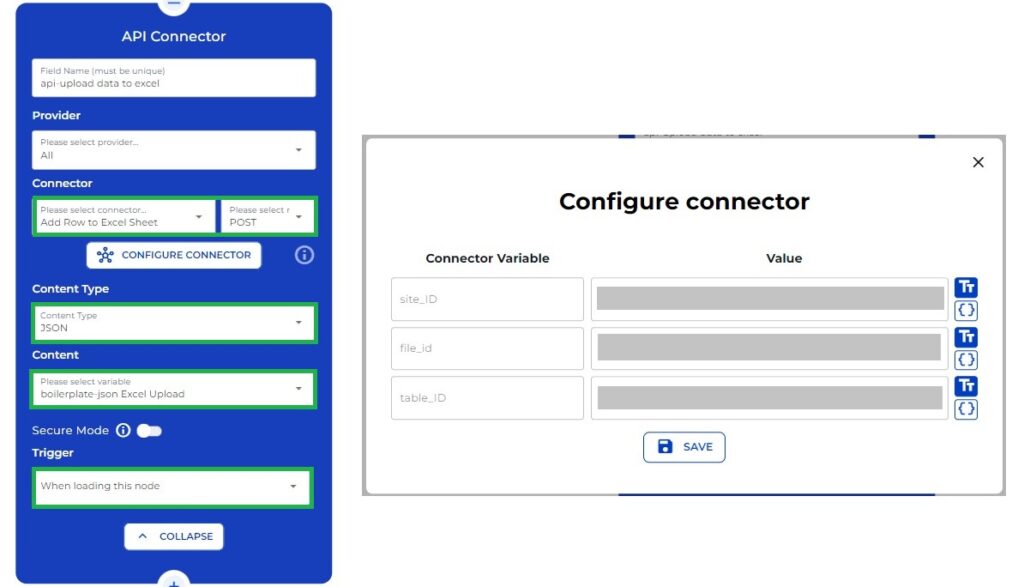
Step 10: Final API Connector Configuration
Configure the final API connector:
- Name it “API-upload data to Excel”.
- Set method to Post with content type as JSON.
- Ensure unique identifiers (Site ID, File ID, Table ID) are included
- Finalize by setting triggers for automatic execution of all nodes when loaded.
By following these steps, you can effectively set up and utilize Microsoft Graph API Connectors within your automation processes!